
2.6 Step 5: Set Budgets and Alerts
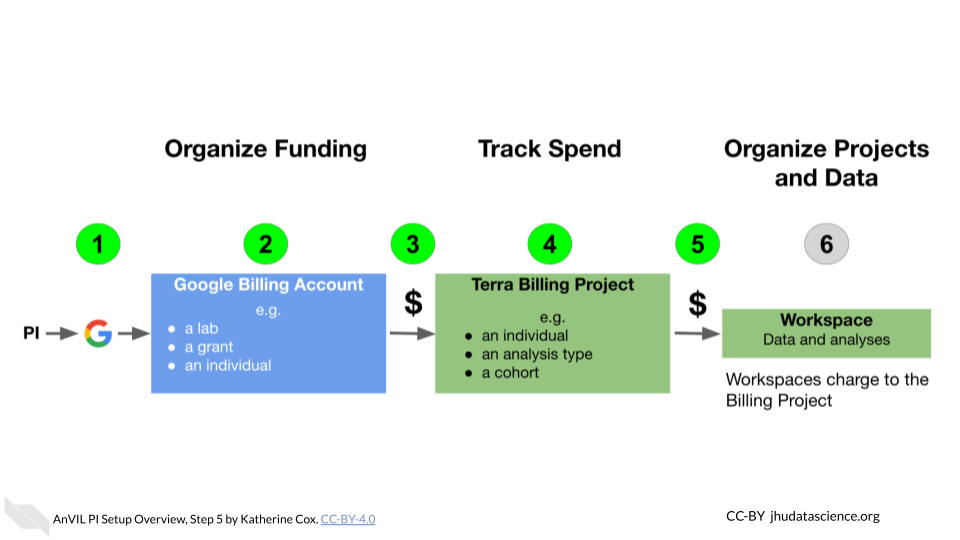
Cloud computing can save a great deal of money, time and effort by providing compute on an as-needed basis. However, care must be taken that users do not accidentally request excessive resources, or leave resources running when not needed.
Unfortunately, there are two issues that make direct cost control difficult:
- The Google Cloud billing interface does not provide a way to automatically cancel computations when a spending threshold is reached
- Compute costs are reported with a delay (~1 day)
As a PI or lab manager, there are some steps you can take to help monitor and limit spending:
- Be careful with members and permissions in your Billing Projects and Workspaces on Terra (see Adding Users and Workspaces for recommended setup)
- Most importantly, monitor your spending so you can shut down unnecessary expensive activities before they have time to accumulate.
- Terra provides extensive documentation and examples regarding cost management while working in the cloud
We highly recommended you set budgets and alerts to notify you if spending starts to exceed expectations. This will make it easier to notice and shut down any accidental overspending. A good starting point is to set a monthly budget, and then set alerts at 50 percent and 90 percent of expected spend. You can add additional alerts if you desire.
You can set a single Budget for your entire lab, set up individual budgets for each Billing Project, or even set budgets for certain subsets of your Billing Projects. This will depend on the size of your lab and how closely you want to monitor spending. More granular budgets make it quicker to notice and track down overspending from a particular project but mean you will get more emails every month. When setting budgets with broader scope, you can always find out which particular Billing Project is spending the money by checking in the GCP Billing interface. NOTE: that there may be some restrictions on the budgets and alerts you can set while you’re using GCP’s free credits. At the time of writing (Feb 2021) you are not able to set budgets for individual projects while you are using the GCP free credits, but can still set an overall budget. Any restrictions should be lifted when you upgrade to a paid account.
2.6.1 Set Alerts
Log in to the Google Cloud Platform console using the Google ID associated with your Google Cloud projects.
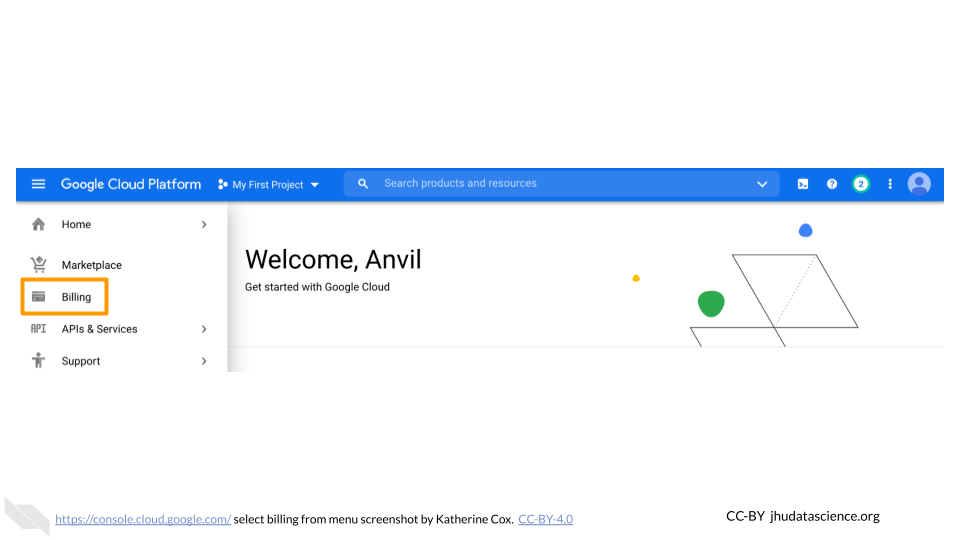
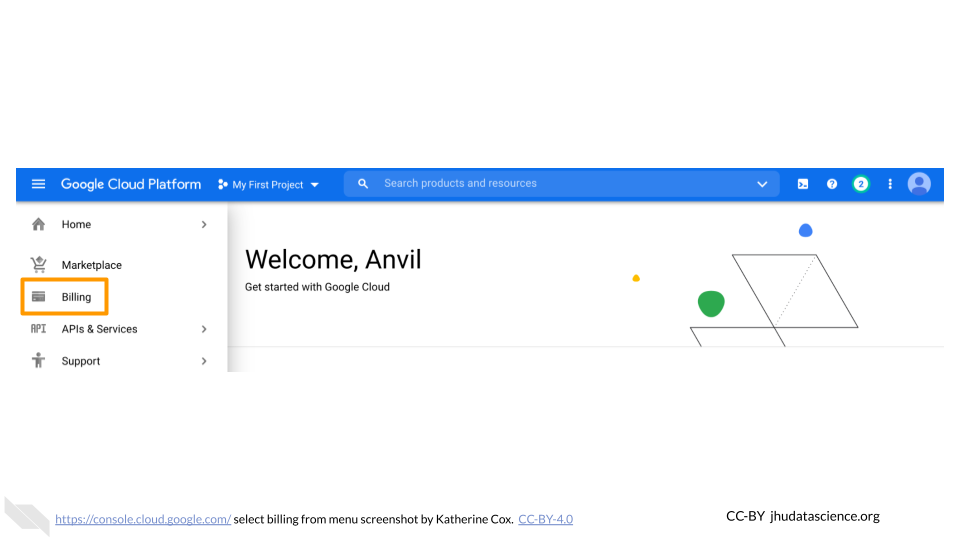
Open the dropdown menu on the top left and click on Billing.
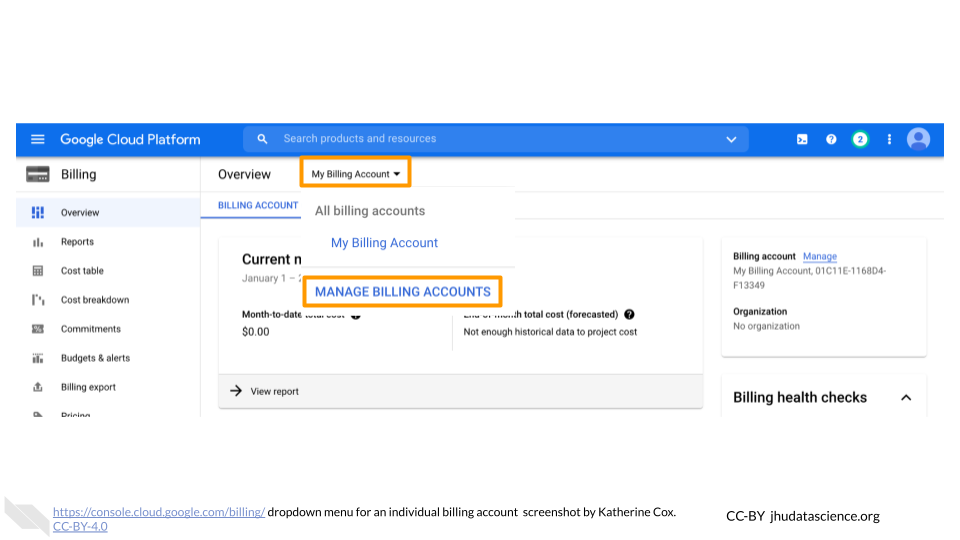
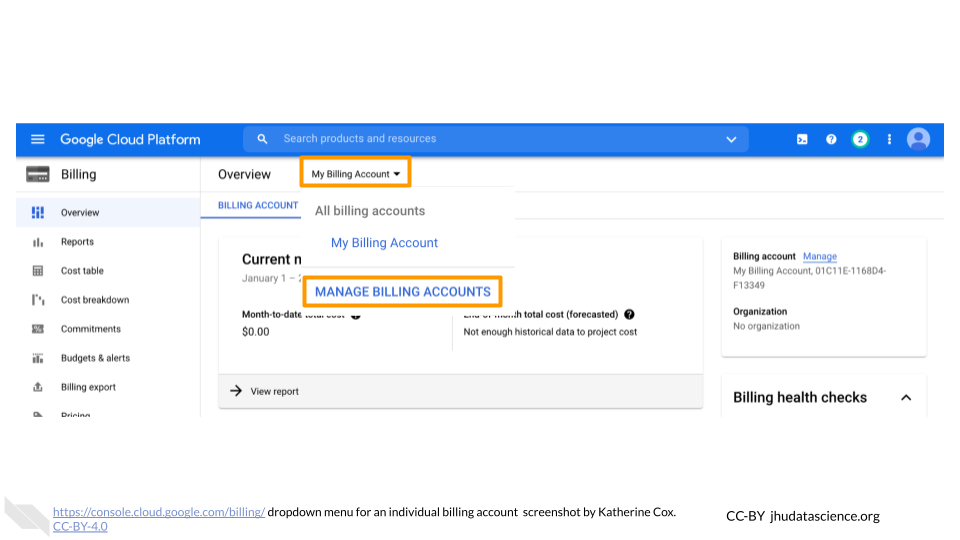
You may be automatically directed to view a specific Billing Account. If you see information about a single account (and it’s not the one you’re interested in), you can get back to the list of all your Billing Accounts by clicking “Manage Billing Accounts” from the drop-down menu.
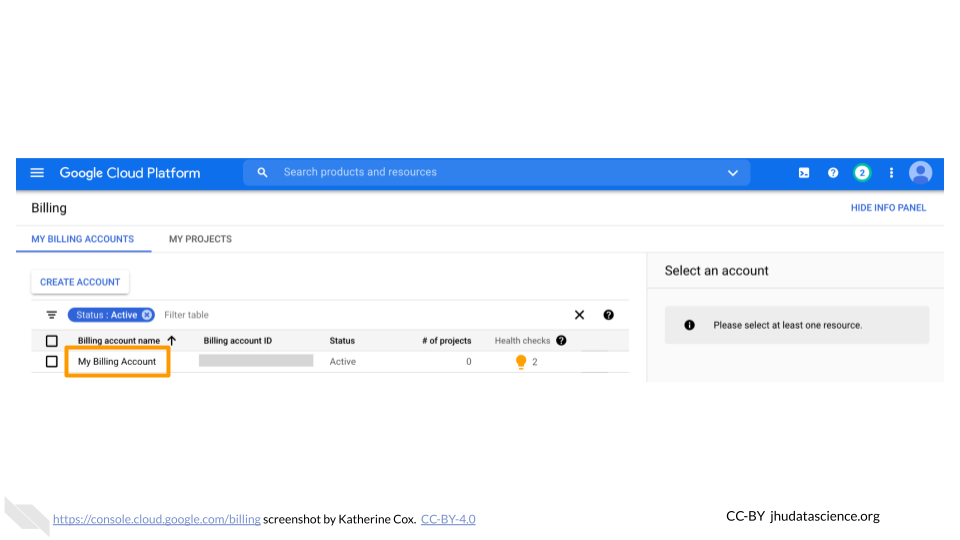
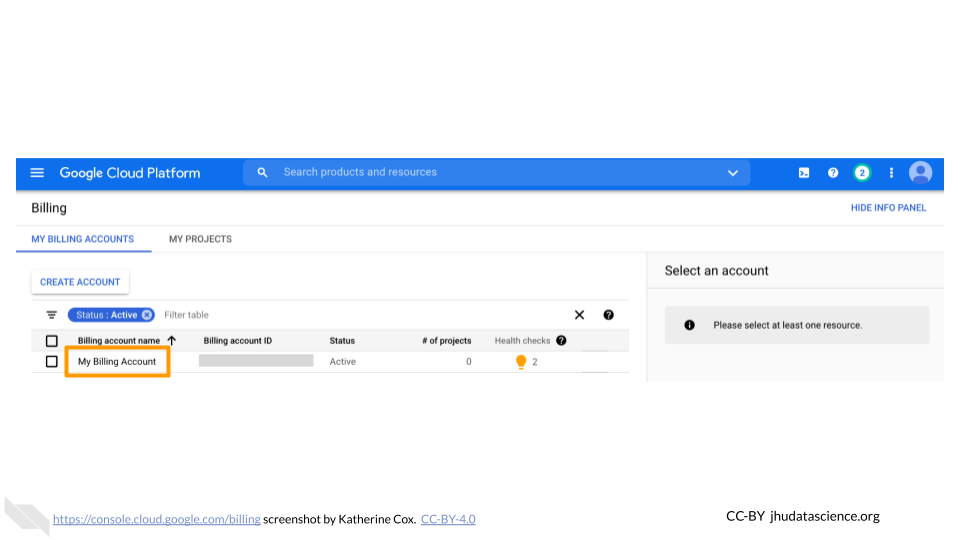
Click on the name of the Billing Account you want to set alerts for.
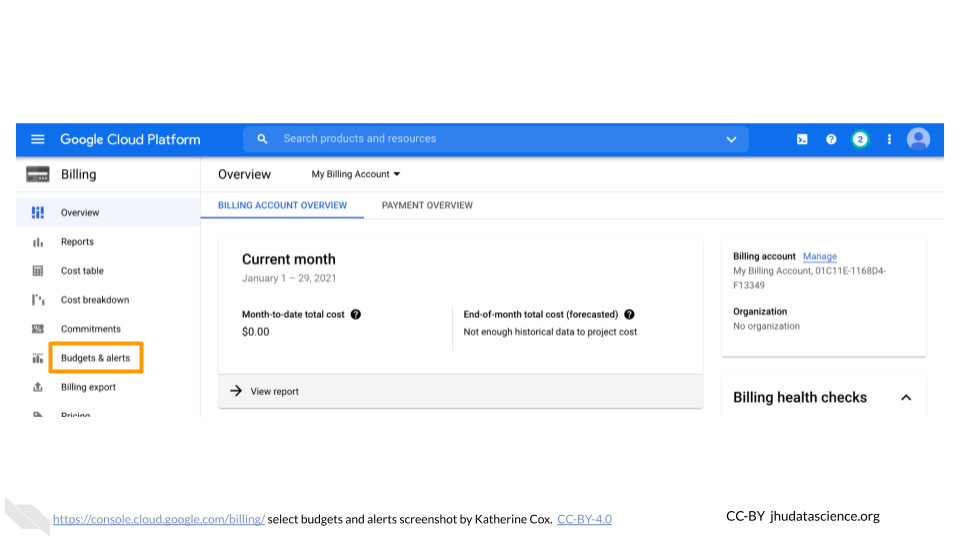
In the left-hand menu, click “Budgets & alerts”.
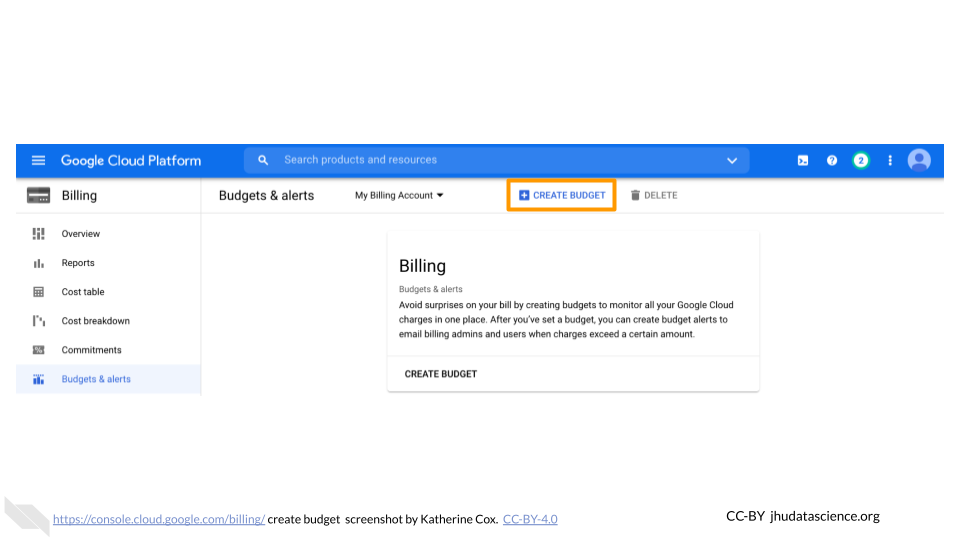
Click the “Create Budget” tab.
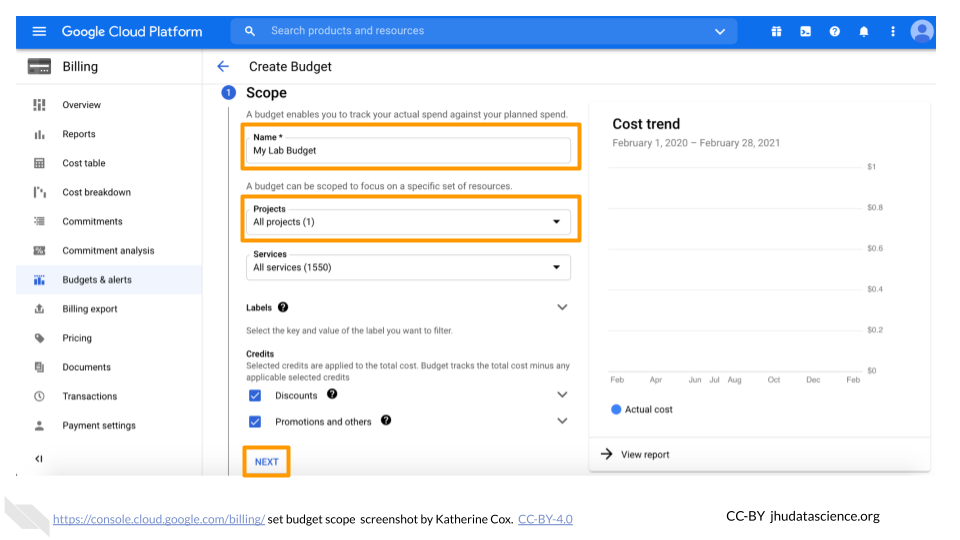
Enter a name for your budget, and then choose which projects you want to monitor. Then click “Next”.
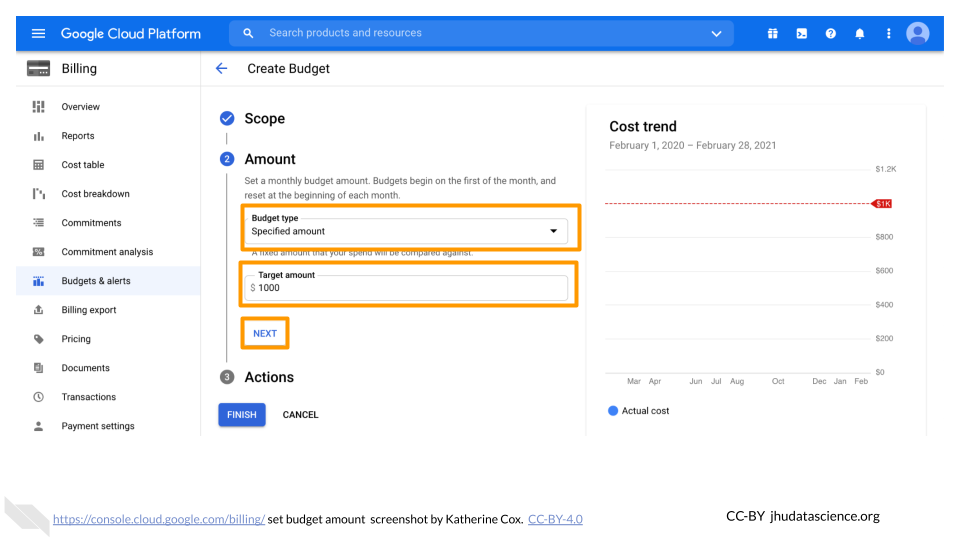
For Budget Type, select “Specified amount”. Enter the total budget amount for the month (you will set alerts at different thresholds in the next step). Click “Next” (do not click “Finish”).
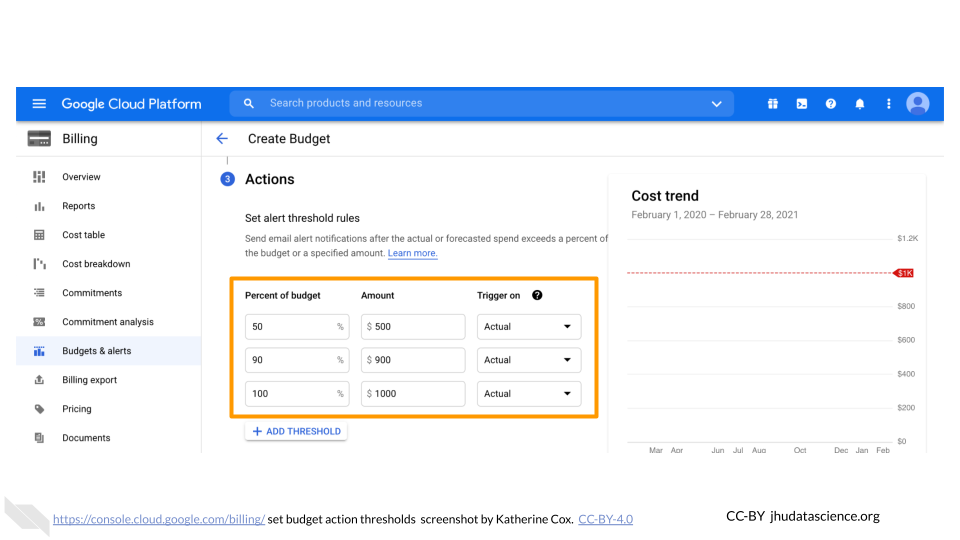
Enter the threshold amounts where you want to receive an alert. We recommend starting with 50% and 90%. You can set other alerts if you prefer.
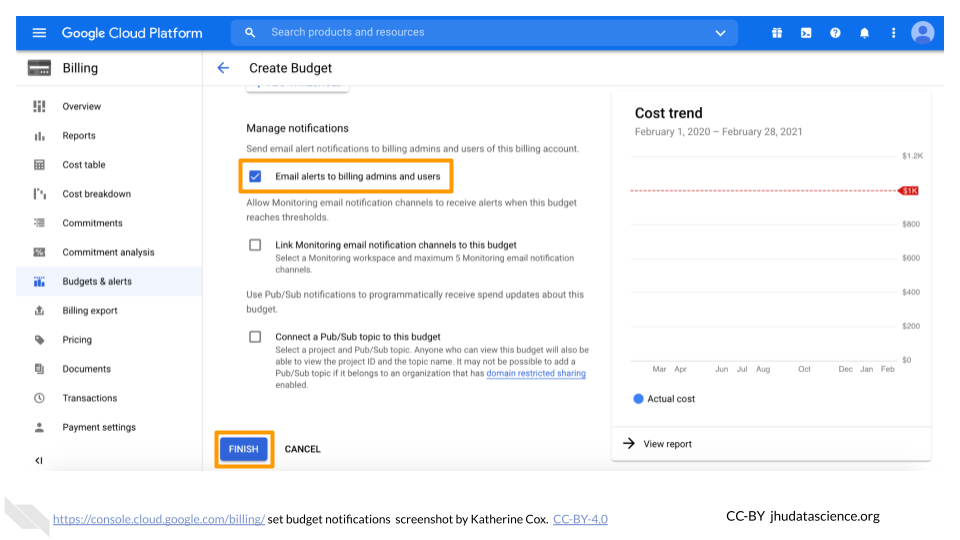
Check the box for “Email alerts to billing admins and users”, then click “Finish”. Now you (as the owner and admin), along with anyone you added with admin or user privileges (e.g. lab managers) will receive alerts when your lab members reach the specified spending thresholds. These emails will be sent to the Gmail accounts associated with the Billing Account.
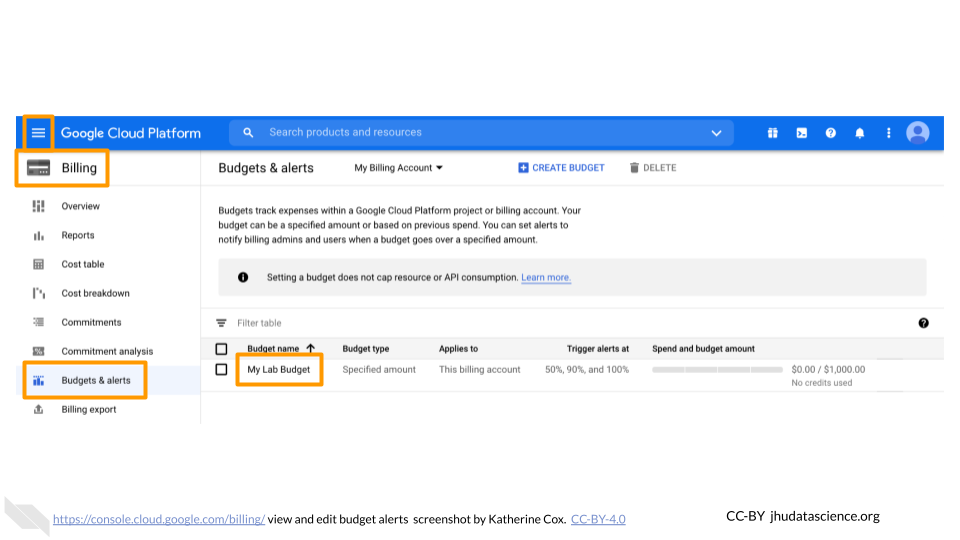
You can edit your budgets at any time by going to Billing > Budgets & alerts, and clicking on the name of the budget you want to edit.
2.6.2 View spend
You can always check your current spend through the Google Billing console, but remember
- There is a reporting delay (~1 day), so you cannot immediately see what an analysis cost
- Costs are reported at the level of Workspaces, so if there are multiple people using a Workspace, you will not be able to determine which of them was responsible for the charges.
The Google Billing console displays information by Billing Account. To view spending:
Log in to the Google Cloud Platform console using the Google ID associated with your Google Cloud projects.
Open the dropdown menu on the top left and click on Billing.
You may be automatically directed to view a specific Billing Account. If you see information about a single account (and it’s not the one you’re interested in), you can get back to the list of all your Billing Accounts by clicking “Manage Billing Accounts” from the drop-down menu.
Click on the name of the Billing Account for the project you want to view.
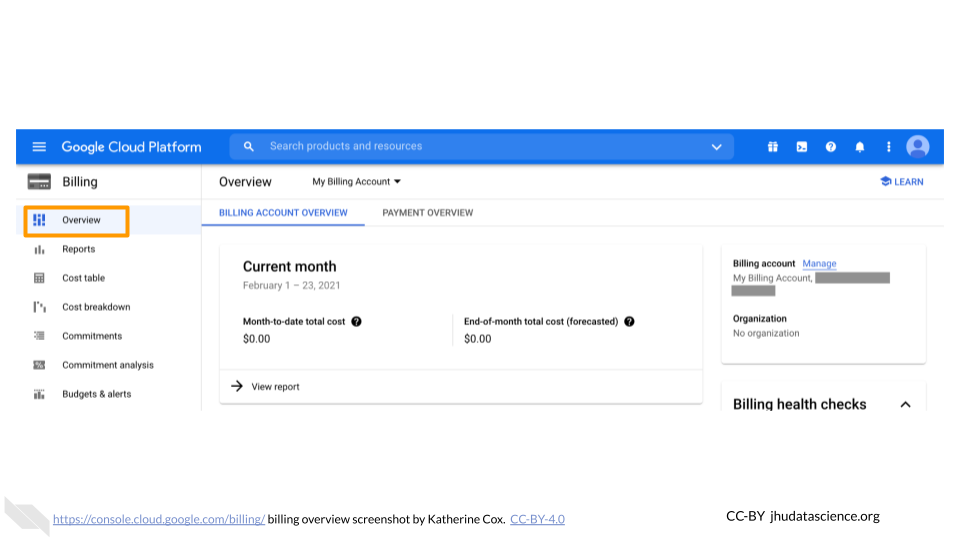
Look at the top of the Overview tab to see your month-to-date spending.
Scroll further down the Overview tab to show your top projects.
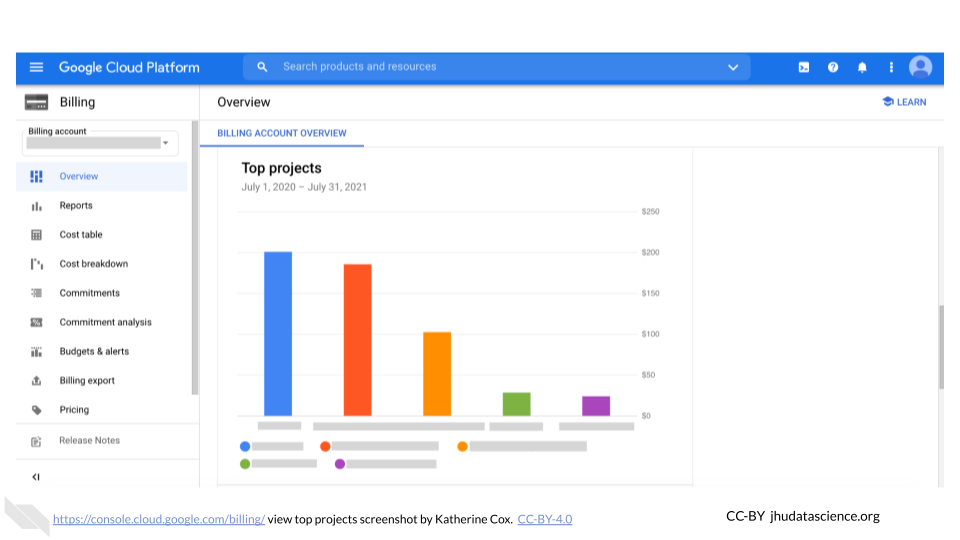
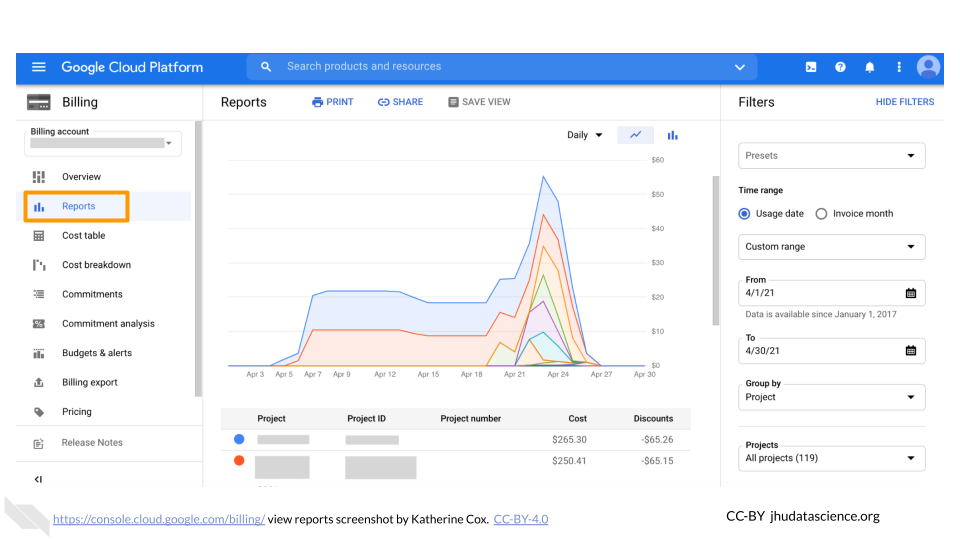
Click on the Reports tab to see more detailed information about each of your projects. This is probably the most useful tab for exploring costs of individual projects over time.
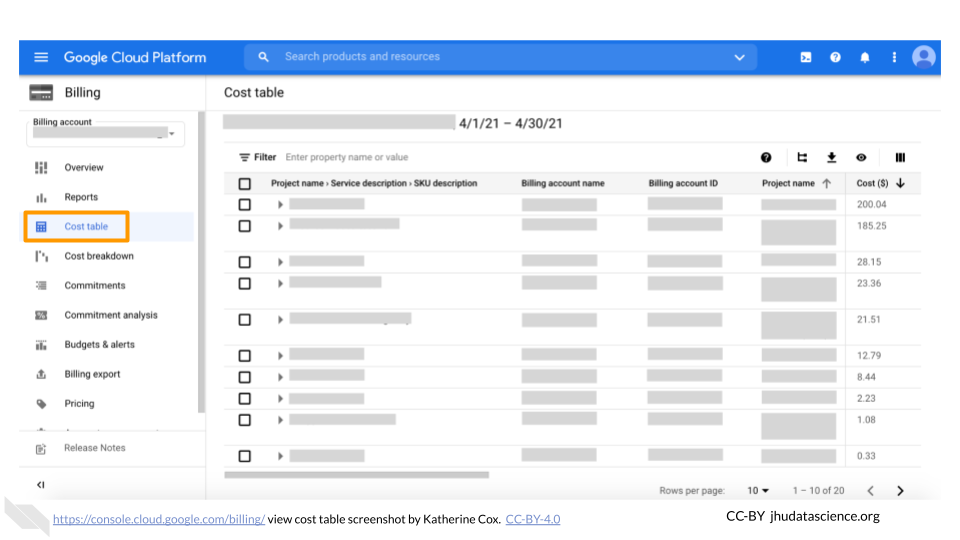
Click on the Cost table tab to obtain a convenient table of spending per project.
2.6.3 Export Cost Data to BigQuery
Coming soon – instructions on how to export your cost data so you can better analyze and control your expenses.