
9.1 Bring Your Own Data
9.1.1 Overview
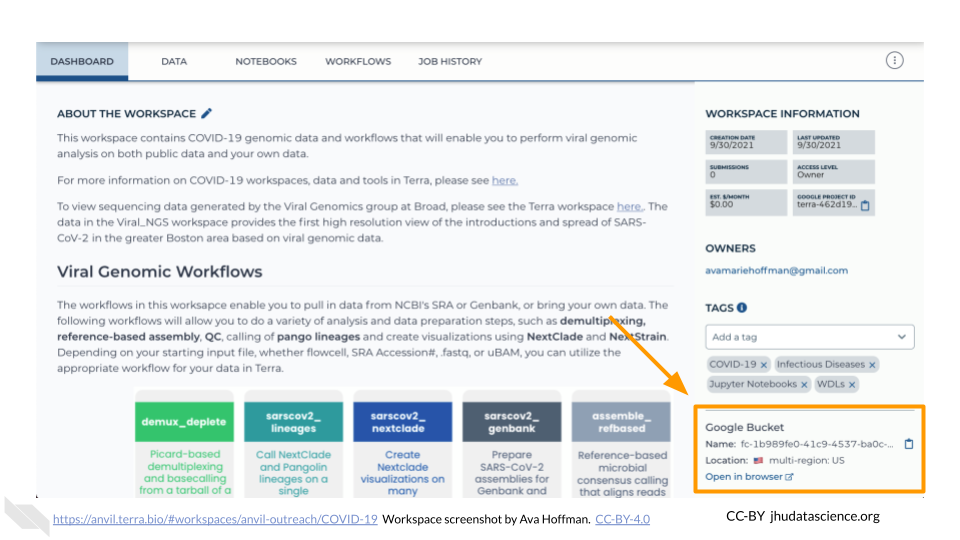
The starting point for bringing your own data to AnVIL is the Workspace Dashboard. At the bottom right, you’ll find the full path to the Google Bucket information corresponding to your Workspace. You can click the clipboard icon on the right to copy the name of your Workspace Bucket. You will be able to see any uploaded files by clicking the “Open in browser” link.
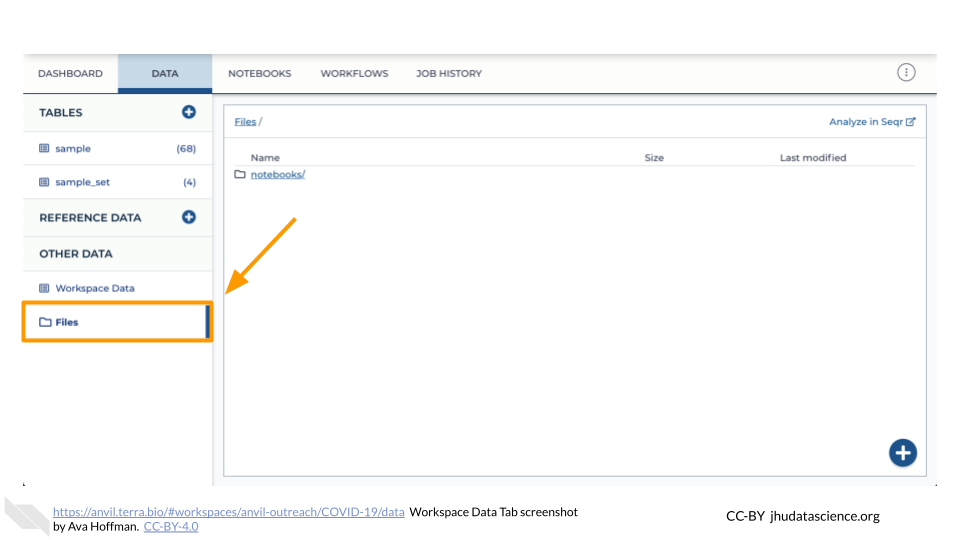
You can also see any uploaded files by clicking the “Files” directory at the bottom left in the Data Tab.
9.1.2 Browser: Upload Single Files
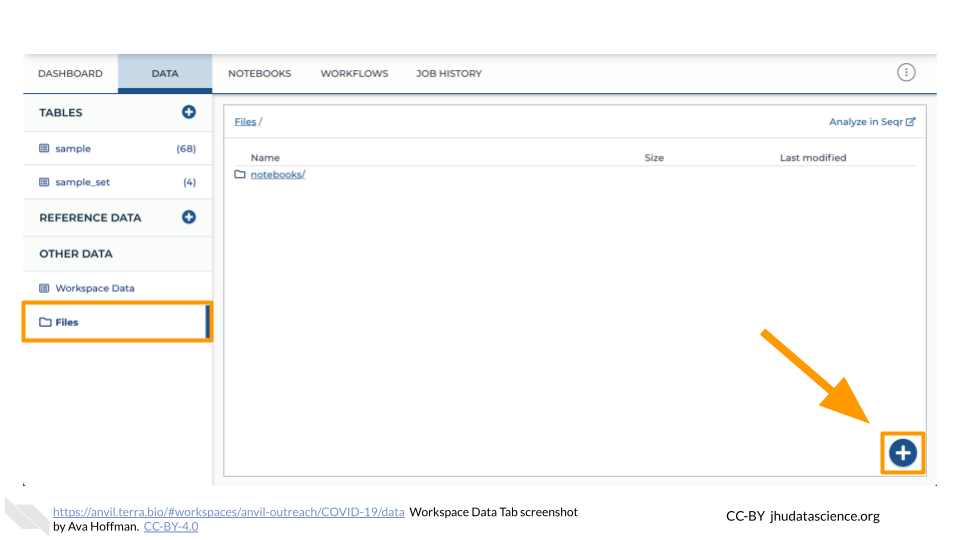
Click the “Files” directory at the bottom left of the Data Tab. Then click the “+” button in the bottom right corner of the screen. This will prompt a file browser on your local machine.
9.1.3 Browser: Upload Folders
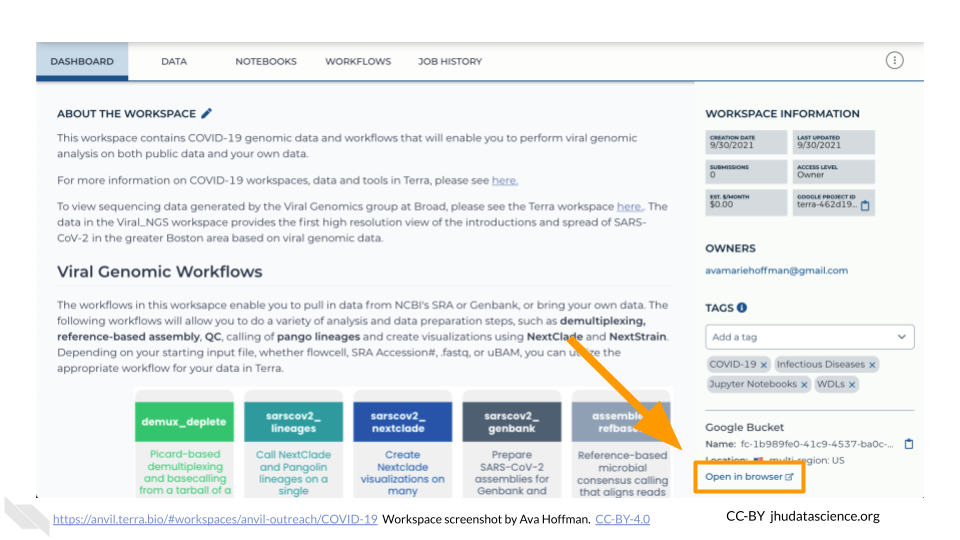
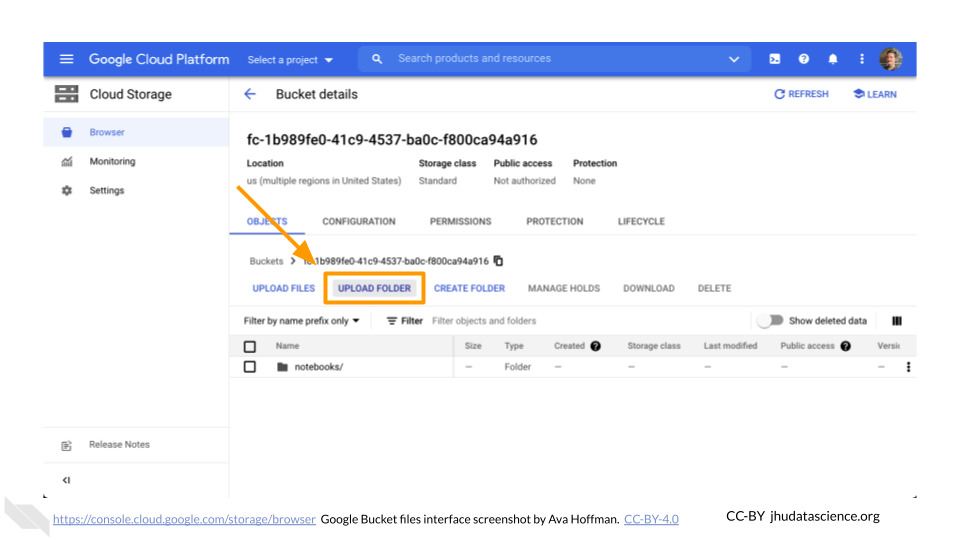
Click the “Open in browser” link on the bottom right of the Workspace Dashboard Tab. This will open a new browser window or tab directed to your Workspace’s Google Bucket on the Google Cloud Platform.
Here, you can upload files and manage your data and folders. You can also upload an entire folder by clicking on “UPLOAD FOLDER”.
9.1.4 gsutil: Local to Cloud
gsutil is a Python application that lets you access Cloud Storage from the command line in a terminal. The terminal you use can be run on your local machine (local instance) or built into the Workspace Cloud Environment.
9.1.4.1 Install gsutil on Your Local Computer or Local Server
Cloud SDK is a set of tools that you can use to manage resources and applications hosted on Google Cloud. These tools include the gsutil command-line tool.
- Ensure you have a terminal available.
- MacOS and Linux users have a terminal application available by default. Terminal applications are also available through third party software, such as RStudio.
- Windows users should download a terminal application, such as Putty.
- Install Cloud SDK following the appropriate link below:
- Test that Cloud SDK has been successfully installed by typing
gsutilin the terminal application prompt:
gsutilIf the installation was successful, you should see information about using gsutil that looks like the following:
Usage: gsutil [-D] [-DD] [-h header]... [-i service_account] [-m] [-o] [-q] [-u user_project] [command [opts...] args...]If the installation was not successful, you should see a warning that gsutil was not found. Please return to the installation steps to ensure they have been completed correctly.
command not found: gsutil9.1.4.2 Copy Files From Your Local Computer to a Workspace Bucket
The gsutil cp command allows you to copy data from one machine to another. On your local machine’s terminal, you should use the command in the following format:
gsutil cp where_to_copy_data_from/filename where_to_copy_data_toExample: To copy the file test.bam located on your local computer at users/name/data/ into the Workspace Bucket gs://ab5-27x on the cloud:
gsutil cp users/name/data/test.bam gs://ab5-27xRemember that you can easily copy the Workspace Bucket ID using the clipboard button on the Workspace Dashboard. Please see the gsutil cp documentation for more details, such as how to do parallel multi-threaded/multi-processing copying or copying an entire directory tree. The gsutil cp command can also be used to copy files from one Workspace Bucket to another (cloud-to-cloud copying).