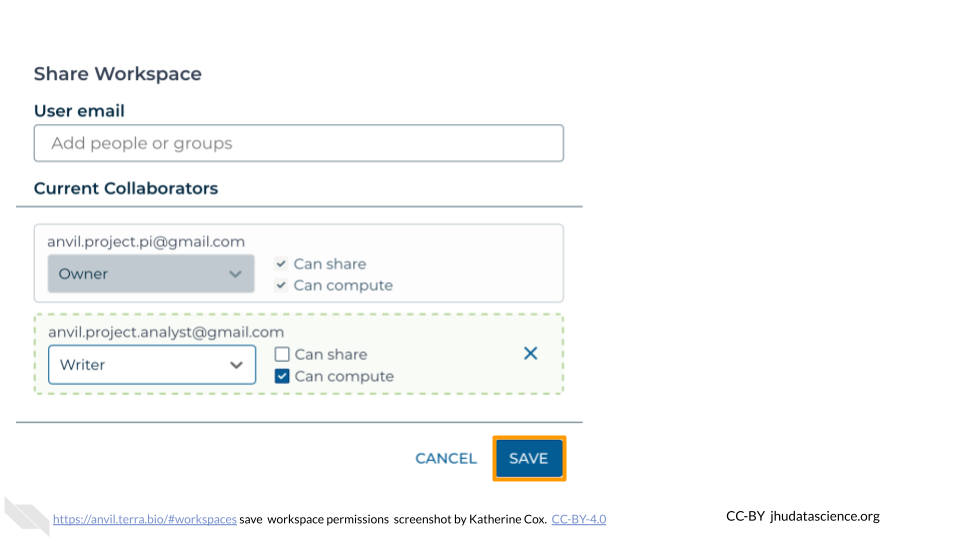
5.4 Add Members to Workspace
Members can be added to a Workspace with a few different permission levels:
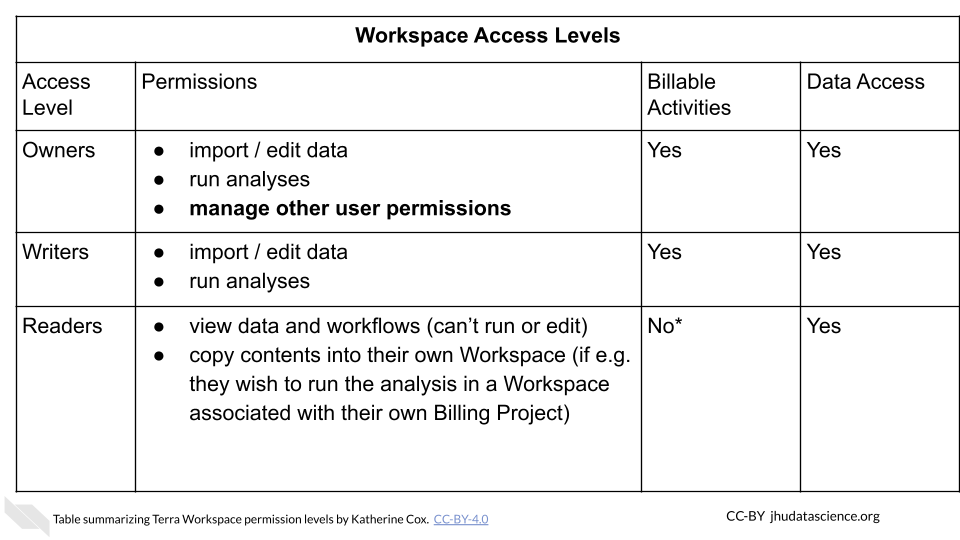
More details about the permissions associated with each Access Level can be found in the Terra documentation.
Managing permissions for a Workspace has important implications:
- Billing: Terra charges are associated with Workspaces rather than users. Any billable activity that takes place in a given Workspace will be charged to the associated Billing Project, regardless of who conducted the activity. If there are multiple users with permission to compute, it is impossible to tell who conducted the activity.
- Data access: Especially when working with protected data, it’s important to ensure that users have proper authorization to view the data before giving them access to a Workspace containing the data. Terra provides Authorization Domains to assist with this.
Make sure you understand what permissions you are granting before adding someone to your Workspace.
To add a member to a Workspace:
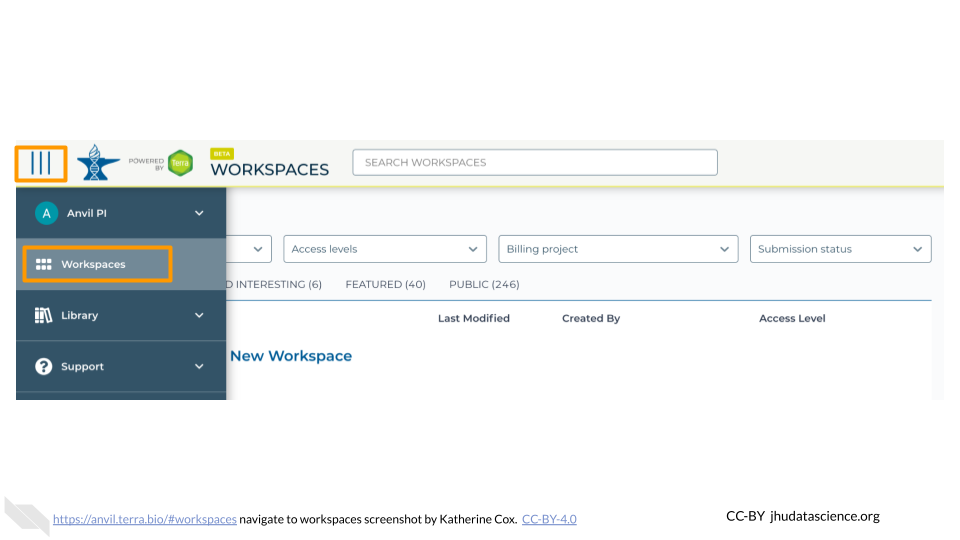
In the drop-down menu on the left, navigate to “Workspaces”. Click the triple bar in the top left corner to access the menu. Click “Workspaces”.
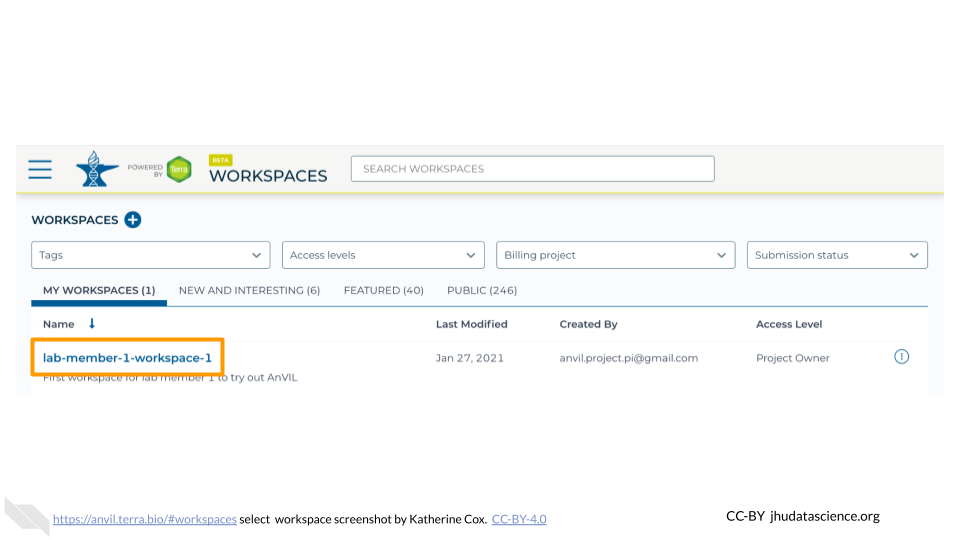
Click on the name of the Workspace to open the Workspace. Opening a Workspace does not cost anything. Certain activities in the Workspace (such as running an analysis) will charge to the Workspace’s Billing Project. Workspace management (e.g. adding and removing members, editing the description) does not cost money.
Click the teardrop button (
 ) on the right hand side to open the Workspace management menu. Click “Share”
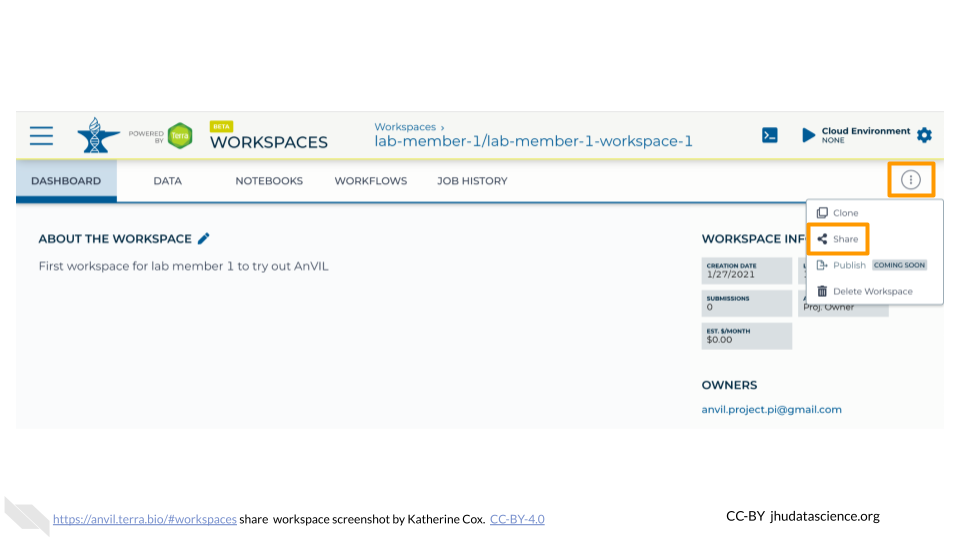
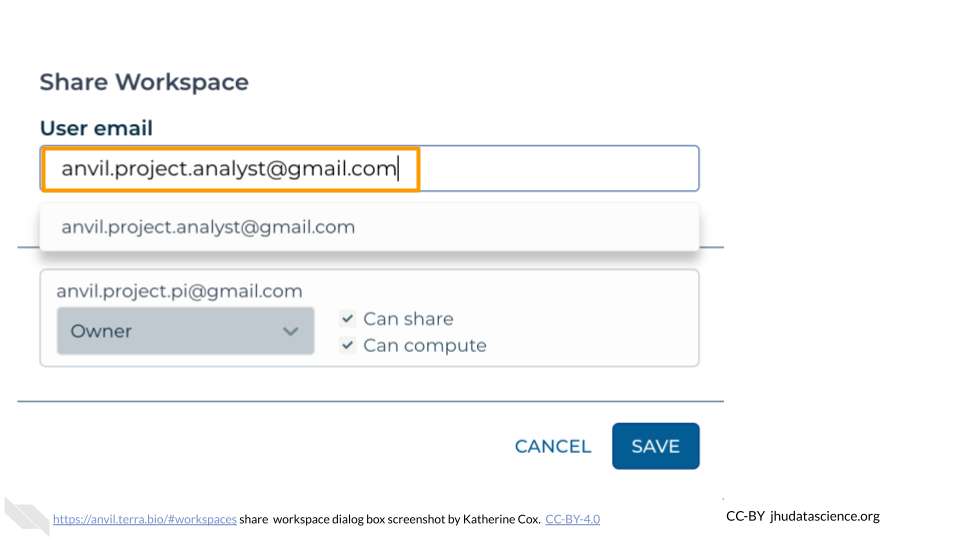
Enter the email address of the user or Group you’d like to share the Workspace with.
- If adding an individual, make sure to enter the account that they use to access AnVIL.
- If adding a Terra Group, use the Group email address, which can be found on the Terra Group management page.
Choose their permission level.
- Remember that all activity in the Workspace will be charged to the Workspace’s Billing Project, regardless of who conducts it, so only add members as “Writers” or “Owners” if they should be charging to the Workspace’s Billing Project.
- “Readers” can view all parts of the Workspace but cannot make edits or run analyses (i.e. they cannot spend money). They can also clone their own copy of the Workspace where they can conduct activity on their own Billing Project.
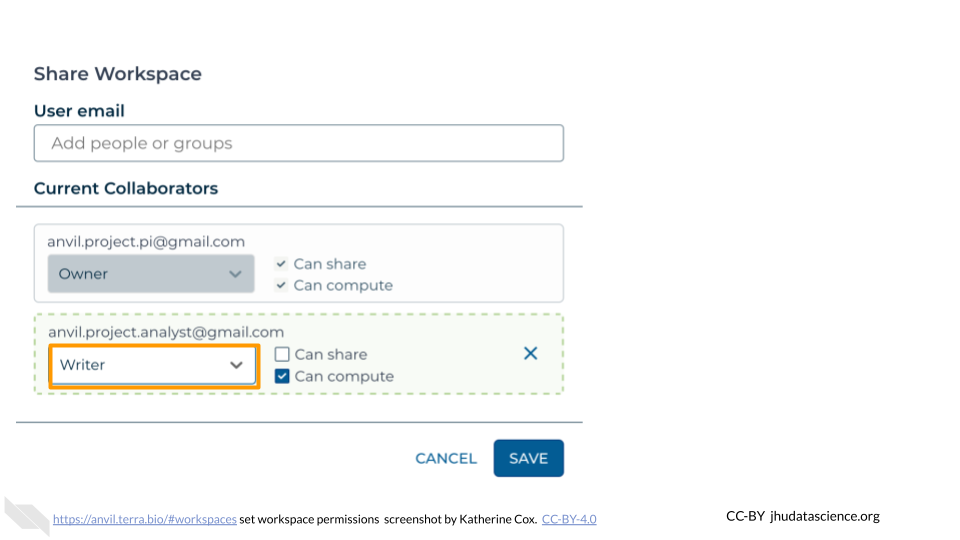
Click “Save”. The user should now be able to see the Workspace when logged in to Terra.
