
2.5 Step 4: Create Terra Billing Projects
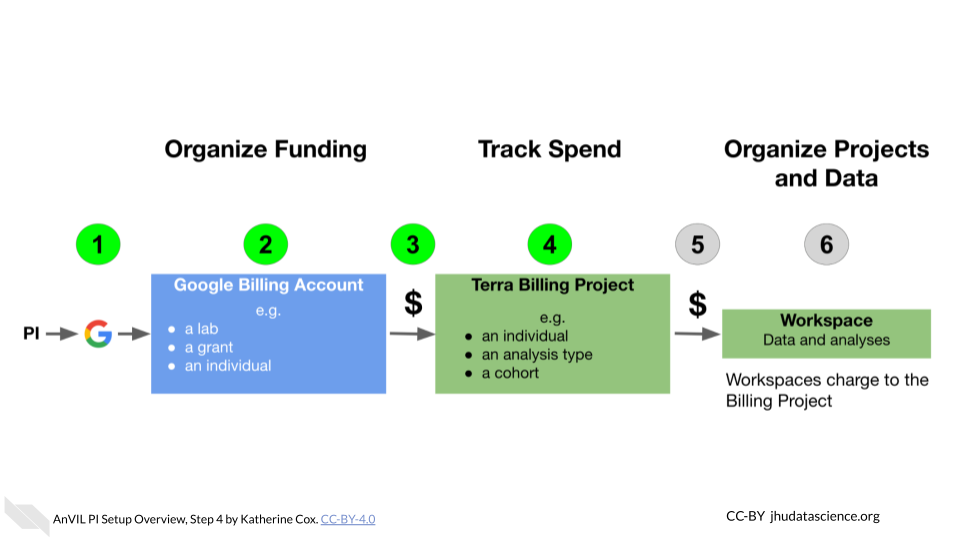
This is how you enable Terra users to charge to the Google Billing Account.
Note that Google will report charges at the level of Billing Projects. If you create only one Billing Project for your lab, you will not be able to see a breakdown of where charges are coming from.
It is highly recommended that you create separate Billing Projects for each category of spending you would like to track. For example:
- A Billing Project for each lab member, if you would like to track individual spending
- A Billing Project for each analysis type, if you would like to track spending on e.g. RNA-seq vs. variant calling.
- A Billing Project for each cohort, if you would like to track spending per data set
If you are uncertain, we recommend starting by setting up a Billing Project per lab member. This makes it easy to track lab member spending, and also makes it easier to cleanly shut down projects when a member leaves the lab.
2.5.1 Create a Billing Project
Launch Terra and sign in with your Google account. If this is your first time logging in to Terra, you will need to accept the Terms of Service.
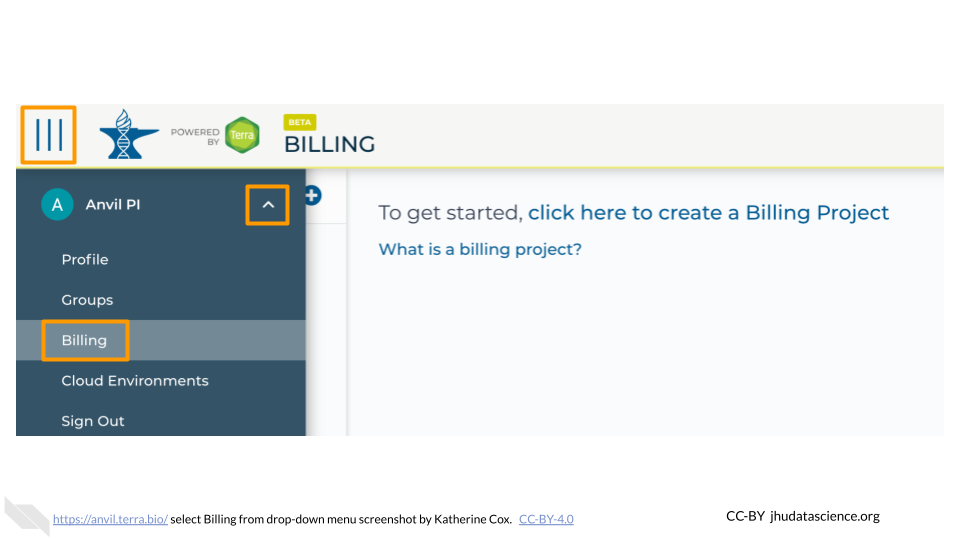
In the drop-down menu on the left, navigate to “Billing”. Click the triple bar in the top left corner to access the menu. Click the arrow next to your name to expand the menu, then click “Billing”. You can also navigate there directly with this link: https://anvil.terra.bio/#billing
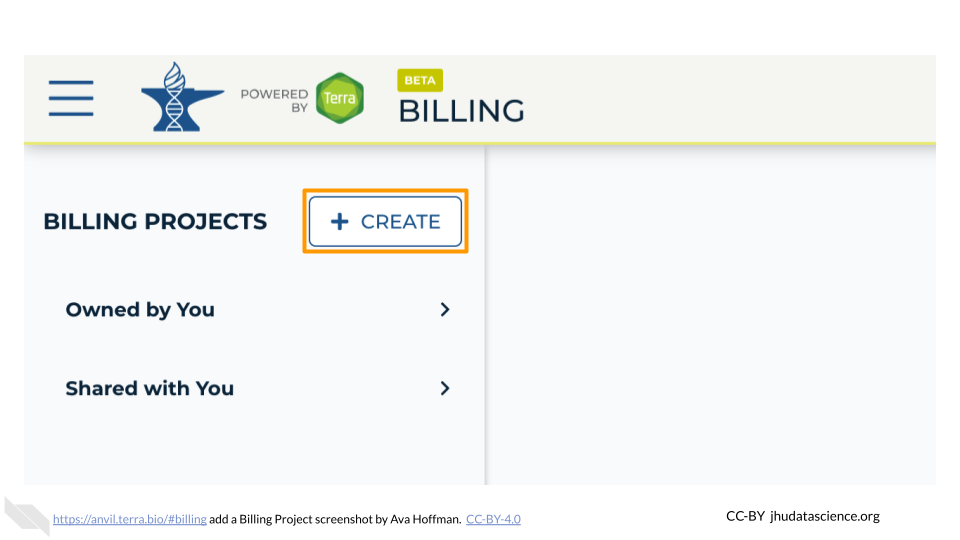
On the Billing page, click the “+ CREATE” button to create a new Billing Project. If prompted, select the Google account to use. If prompted, give Terra permission to manage Google Cloud Platform billing accounts.
Enter a unique name for your Terra Billing Project and select the appropriate Google Billing Account. The name of the Terra Billing Project must:
- Only contain lowercase letters, numbers and hyphens
- Start with a lowercase letter
- Not end with a hyphen
- Be between 6 and 30 characters
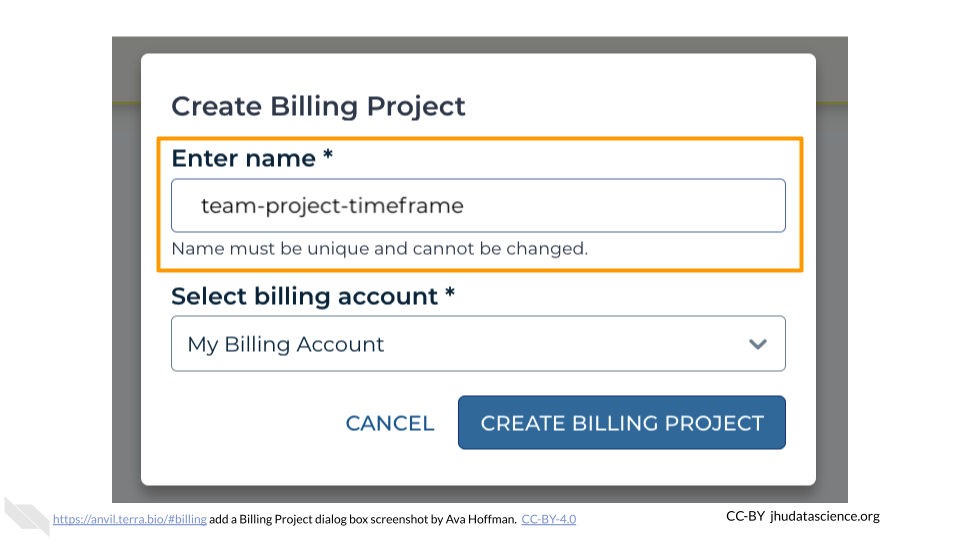
Select the Google Billing Account to use. All activities conducted under your new Terra Billing Project will charge to this Google Billing Account. If prompted, give Terra permission to manage Google Cloud Platform billing accounts.
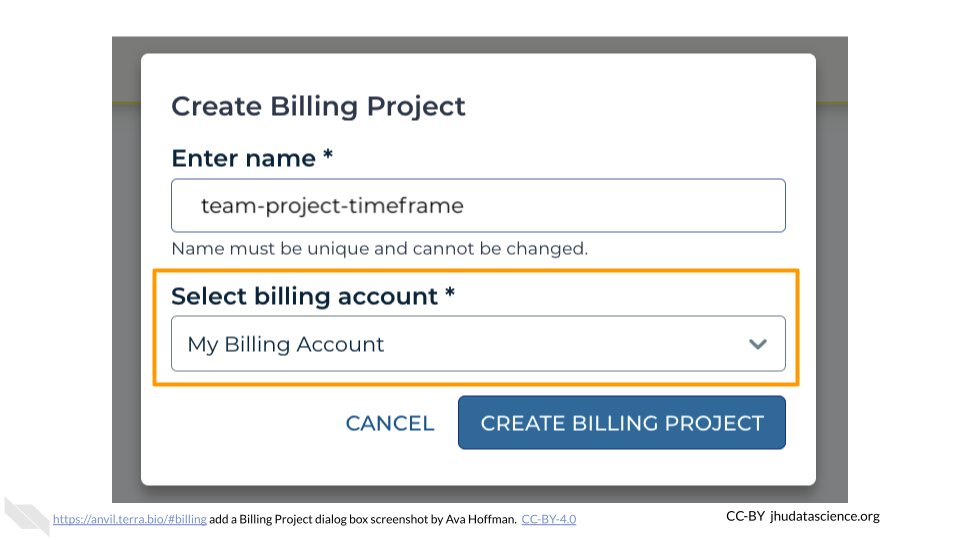
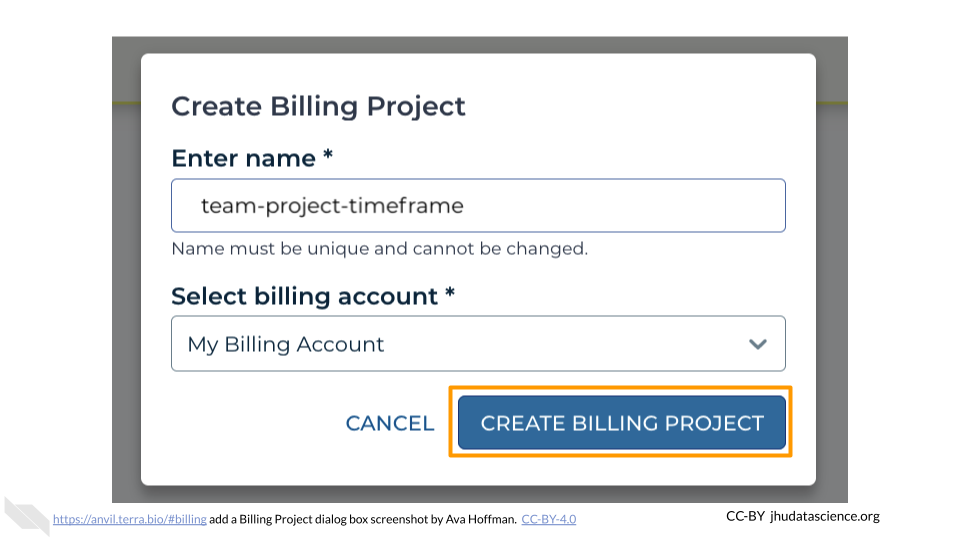
Click “CREATE BILLING PROJECT”.
Your new Billing Project should now show up in the list of Billing Projects Owned by You. You can add additional members or can modify or deactivate the Billing Project at any time by clicking on its name in this list.
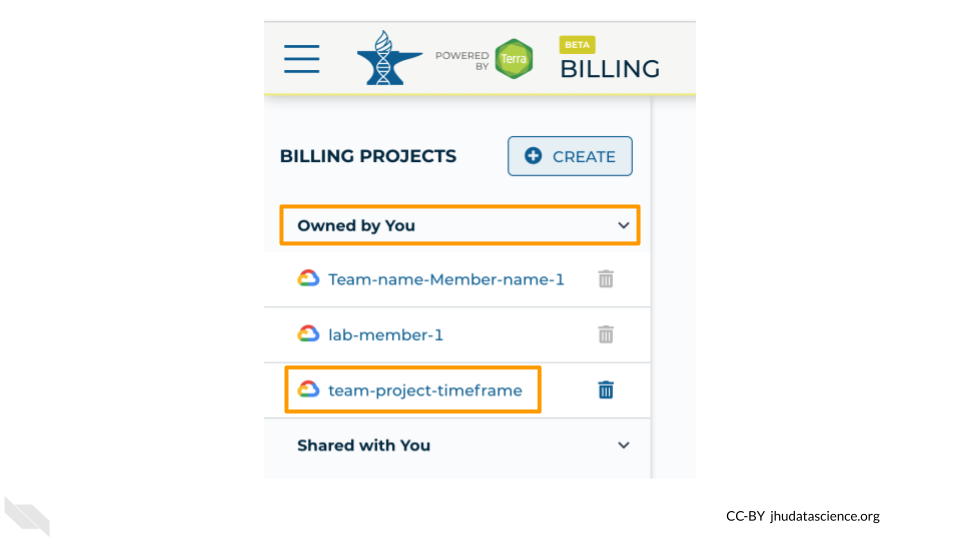
The page doesn’t always update as soon as the Billing Project is created. If it’s been a couple of minutes and you don’t see a change, try refreshing the page.
As mentioned above, we recommend creating separate Terra Billing Projects for each of your team members so you can track their spending. These Billing Projects can all be associated with the same Google Billing Account if they are all funded by the same source.
Having trouble?
- Check out the Troubleshooting appendix
- Visit our community support forum at
help.anvilproject.orgwith any questions.