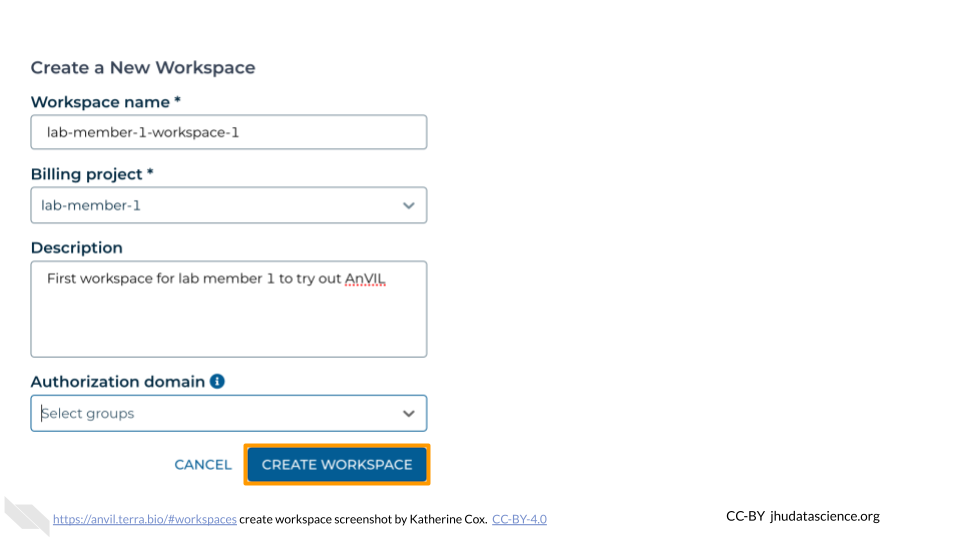
5.3 Create a New Workspace
Creating a new Workspace from scratch allows you to fully customize the contents.
Note that you can only create a new Workspace if you are at least a “User” on a Terra Billing Project. This helps prevent unwanted charges. Workspaces charge money to their associated Billing Project, regardless of who conducts the activity, so it’s important to be careful about who has permission to use the Workspace (see Add Members to Workspace for details).
If you need to create a Workspace but don’t have permission, contact your PI or lab manager so that they can either grant you permission or create the Workspace for you.
The following steps show you how to create a Workspace so you can get started.
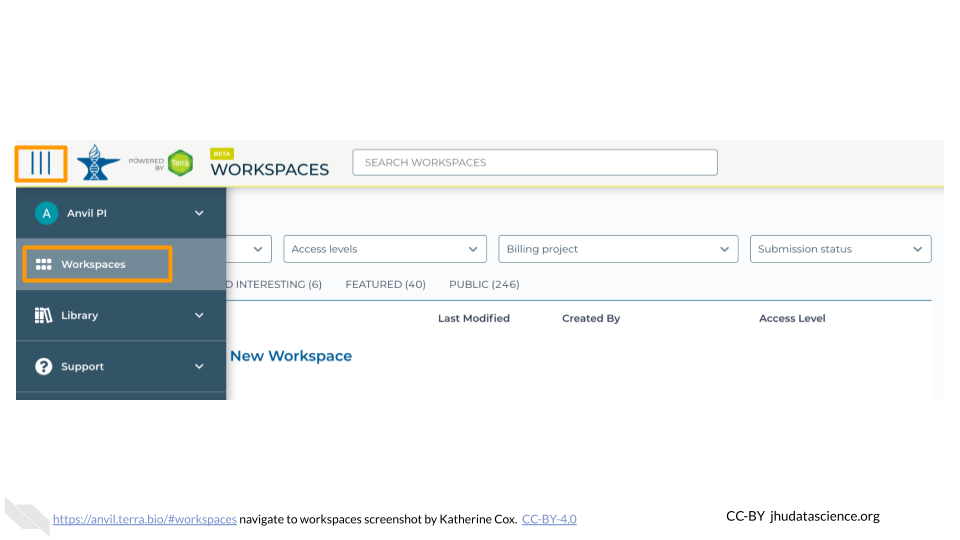
In the drop-down menu on the left, navigate to “Workspaces”. Click the triple bar in the top left corner to access the menu. Click “Workspaces”.
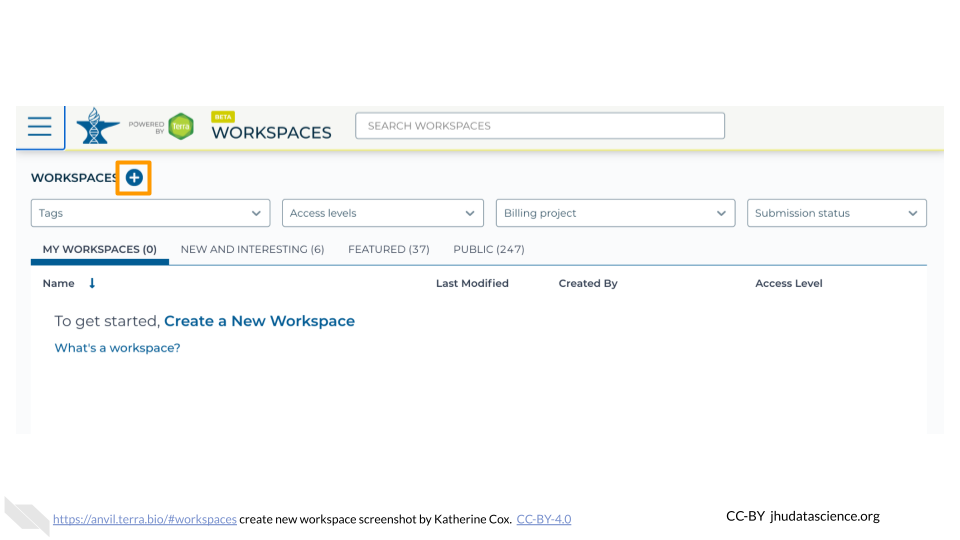
Click on the plus icon near the top of left of the page.
Name your Workspace and select the appropriate Billing Project. All activity in the Workspace will be charged to this Billing Project (regardless of who conducted it).
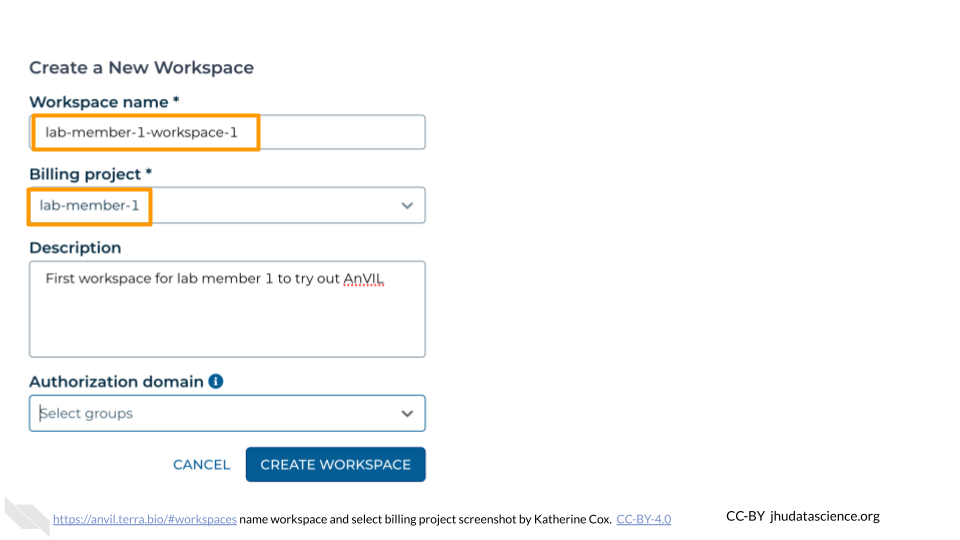
If you are working with protected data, you can set the Authorization Domain to limit who can be added to your Workspace. Note that the Authorization Domain cannot be changed after the Workspace is created (i.e. there is no way to make this Workspace shareable with a larger audience in the future). Workspaces by default are only visible to people you specifically share them with. Authorization domains add an extra layer of enforcement over privacy, but by nature make sharing more complicated. We recommend using Authorization Domains in cases where it is extremely important and/or legally required that the data be kept private (e.g. protected patient data, industry data). For data you would merely prefer not be shared with the world, we recommend relying on standard Workspace sharing permissions rather than Authorization Domains, as Authorization Domains can make future collaborations, publications, or other sharing complicated.
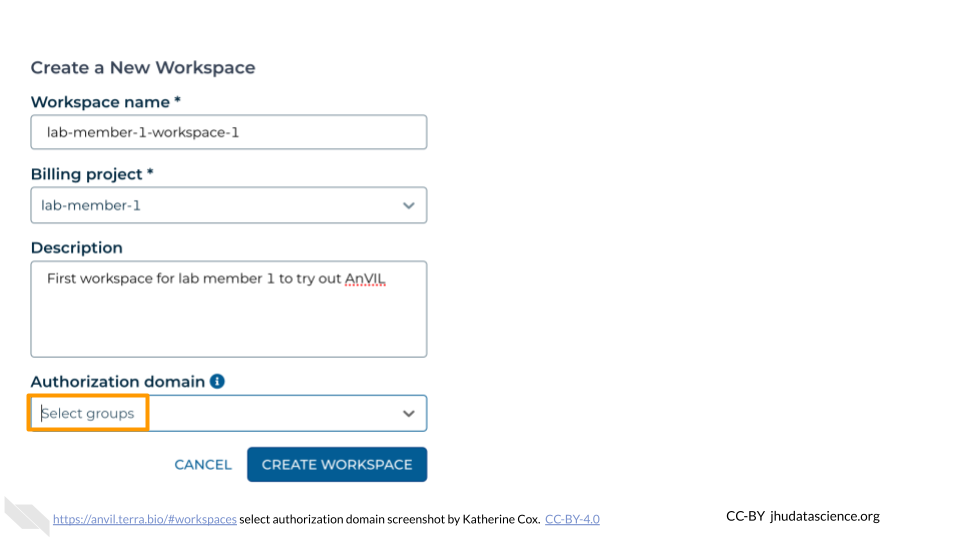
Click “CREATE WORKSPACE”. The new Workspace should now show up under your Workspaces.
