2.4 Step 3: Add Terra to Google Billing Account
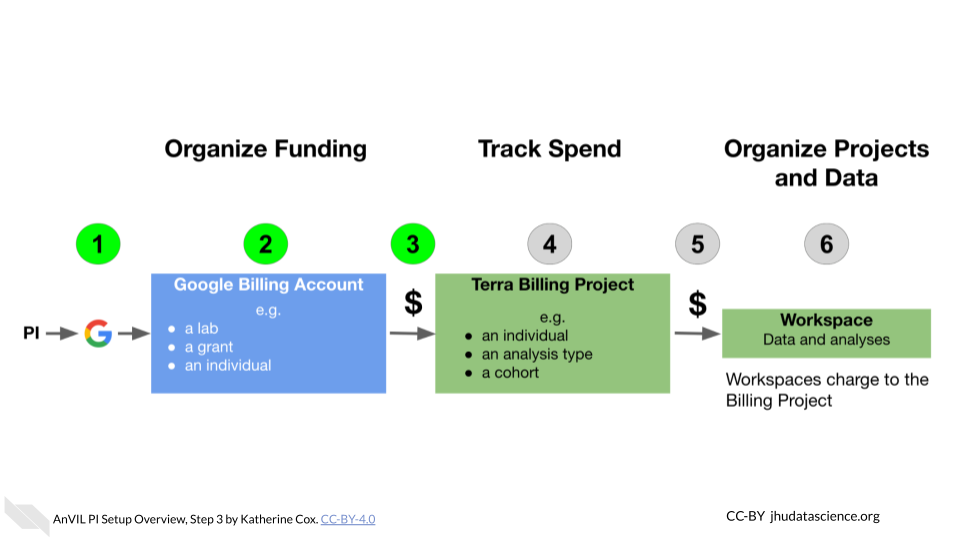
Diagram showing an overview of the six steps. Step 3 is highlighted.

This gives Terra permission to create projects and send charges to the Google Billing Account, and must be done by an administrator of the Google Billing Account.

Terra needs to be added as a “Billing Account User”:

  1. Log in to the Google Cloud Platform console using your Google ID.

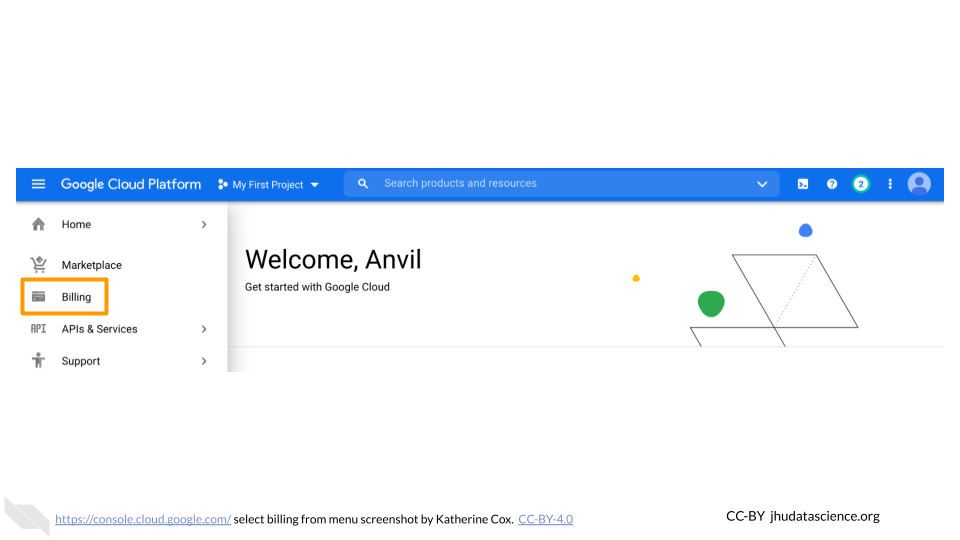
  2. Navigate to Billing

    Screenshot of the Google Cloud Console drop-down menu, with "Billing" highlighted.

  3. You may be automatically directed to view a specific Billing Account. If you see information about a single account rather than a list of your Billing Accounts, you can get back to the list by clicking “Manage Billing Accounts” from the drop-down menu.
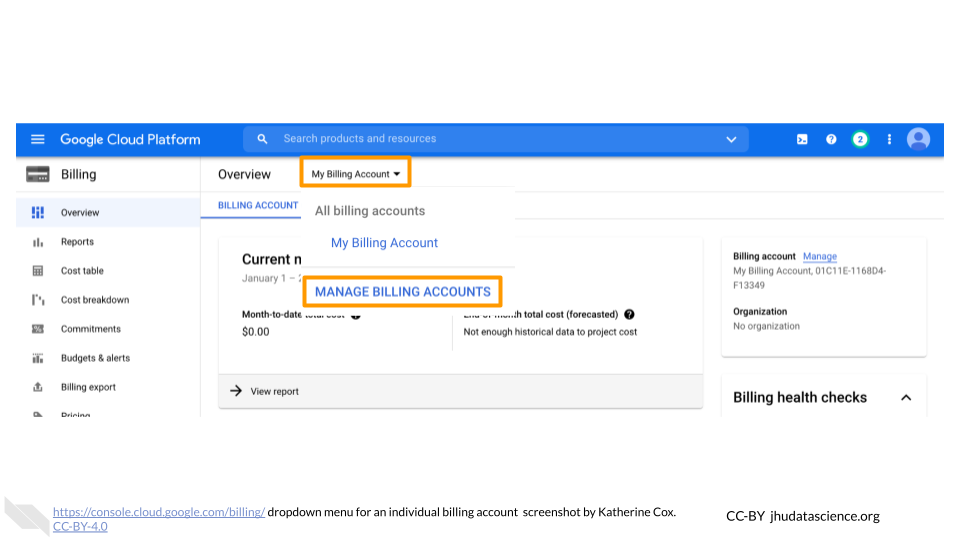
    Screenshot of an individual Google Cloud Billing Account with the drop-down menu item "Manage Billing Accounts" highlighted.

  4. Check the box next to the Billing Account you wish to add Terra to, click “ADD MEMBER”.
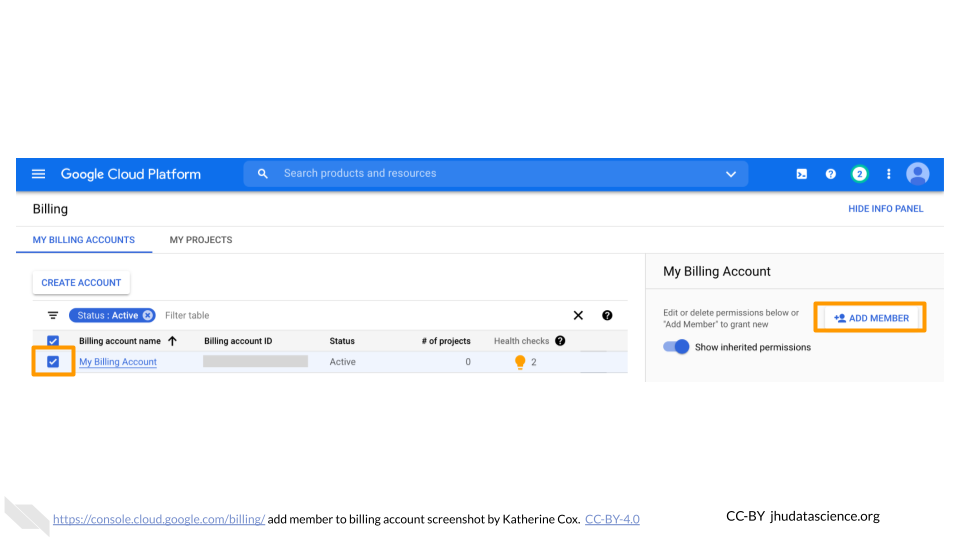
    Screenshot of Google Cloud Billing Accounts Overview. The checkbox next to the name of a Billing Account is checked and highlighted, and the "Add Member" button is highlighted.

  5. Enter terra-billing@terra.bio in the text box. In the drop-down menu, mouse over Billing, then choose “Billing Account User”.
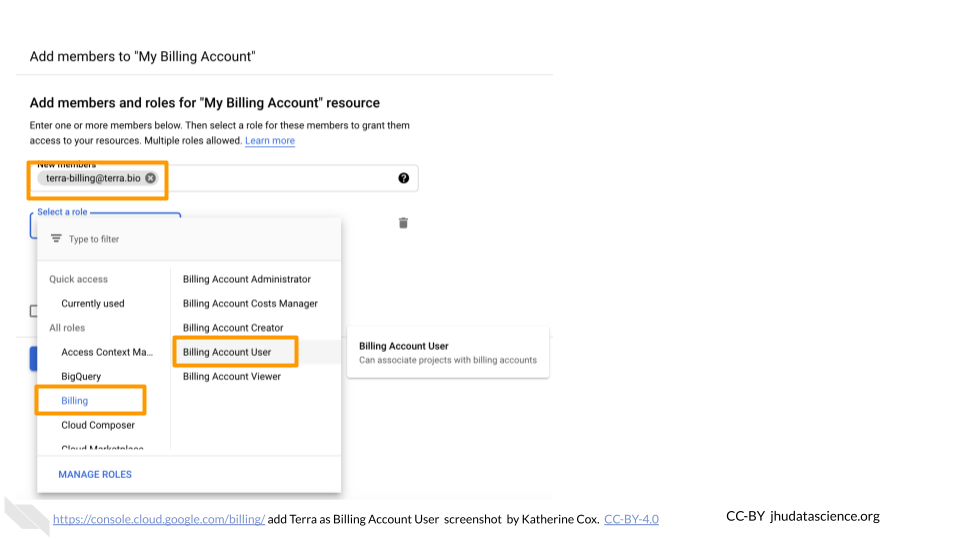
    Screenshot of the dialogue box for adding a member to a Google Cloud Billing Accounts. The text box is highlighted and has been filled in with "terra-billing@terra.bio".  In the drop-down menu labeled "Select a Role", the item "Billing" and the submenu item "Billing Account User" are highlighted.

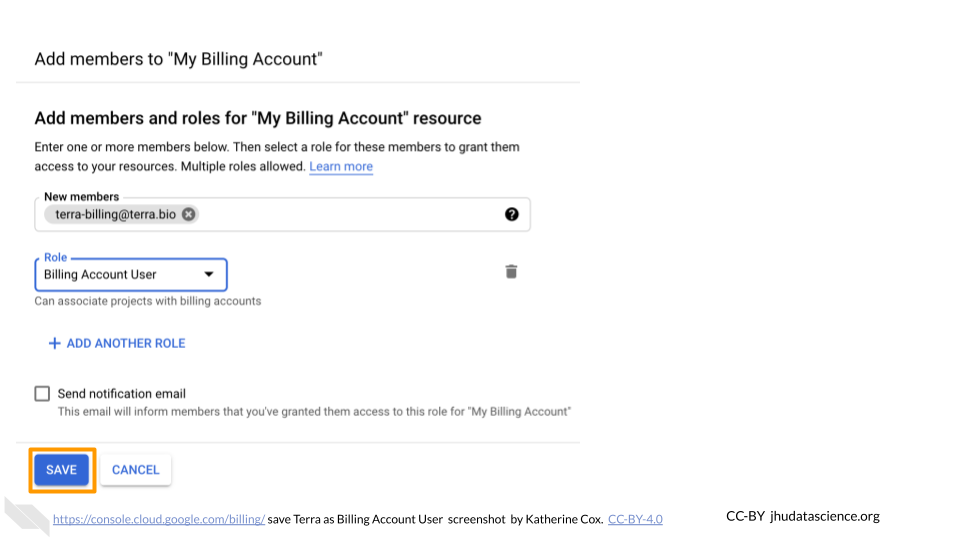
  6. Click “SAVE”.

    Screenshot of the dialogue box for adding a member to a Google Cloud Billing Accounts. The Save button is highlighted.