
Chapter 13 Teach the Class
This chapter covers things that you will generally do on the day of the class:
Before class
- Add students to Billing Project
- Direct students to clone the Workspace (this can be done in the first few minutes of class)
After class
- Give students any necessary instructions on how to save and export any important files, and how to pause or delete their cloud environments
- Collect feedback
13.1 Before: Add Student Group to Billing Project
When you are ready for your students to start computing, you should add the Student Group to your Billing Project. This will enable everyone in the Group to clone or create Workspaces funded by the Billing Project. Everything they do in those Workspaces will be charged to your Billing Project.
We generally recommend waiting until shortly before the class to add students to the Billing Project, to prevent them from starting something up early and accruing costs. However, if you did not create the Terra Billing Project for your class, you should make sure that either you have been given “Owner” permission for the class Billing Project (so you can add students yourself), or that someone who does is prepared to add students in time for your class to start.
To add members to a Billing Project, you must be an “Owner” of the Billing Project.
- If you created the Billing Project yourself, you’re good to go!
- If a third party created the Billing Project, check to see whether you are an Owner or a User. If you are not an Owner, you will need to contact your funding manager. They can either make you an Owner, or can add the Student Group to the Billing Project themselves.
To add the Student Group to the Workspace, you will need the Group email address, which can be found on the Group management page: https://anvil.terra.bio/#groups
The following instructions explain how to add someone to a Terra Billing Project. You will want to add the Student Group to the Billing Project as a User.
Launch Terra and sign in with your Google account.
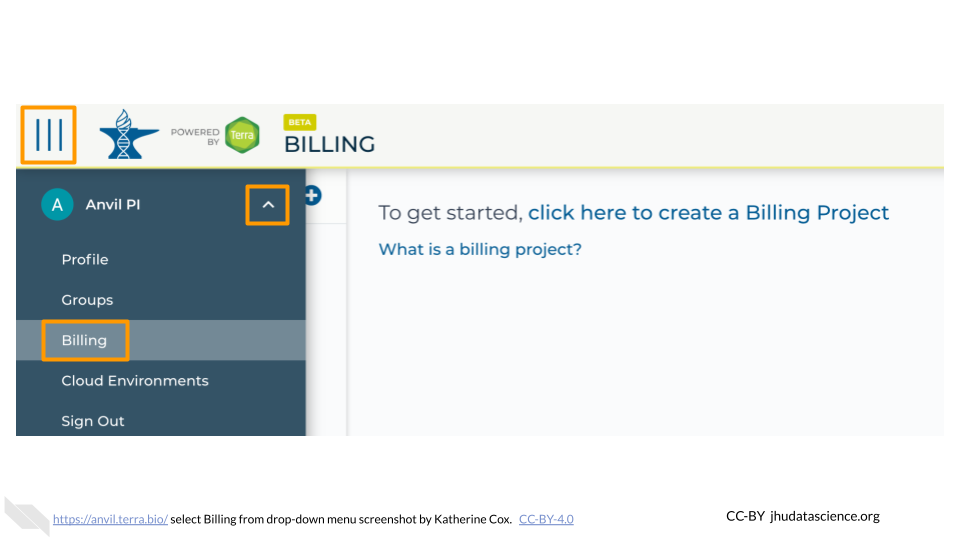
In the drop-down menu on the left, navigate to “Billing”. Click the triple bar in the top left corner to access the menu. Click the arrow next to your name to expand the menu, then click “Billing”. You can also navigate there directly with this link: https://anvil.terra.bio/#billing
Click “Owned by You” and find the Billing Project. If you do not see the Billing Project in this list, then you are not an Owner and do not have permission to add members.
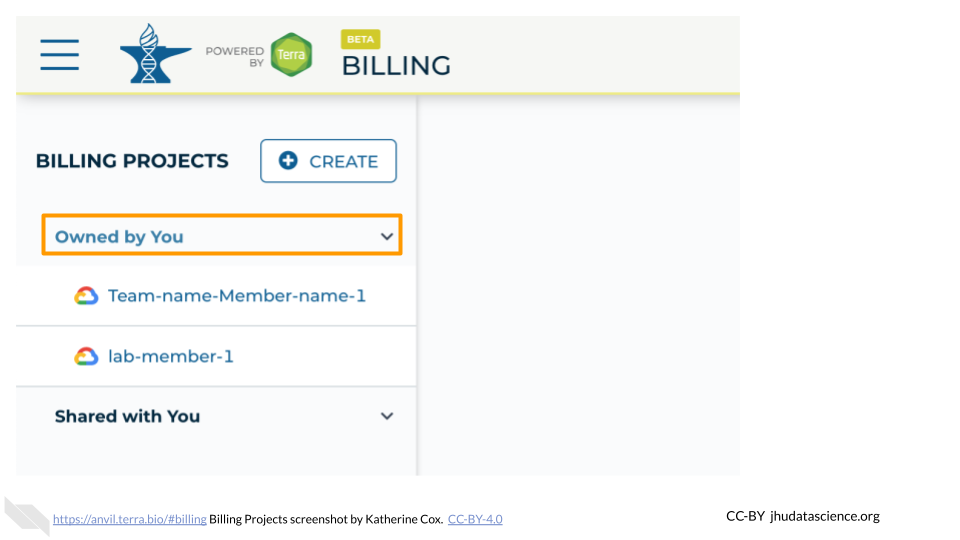
Click on the name of the Billing Project.

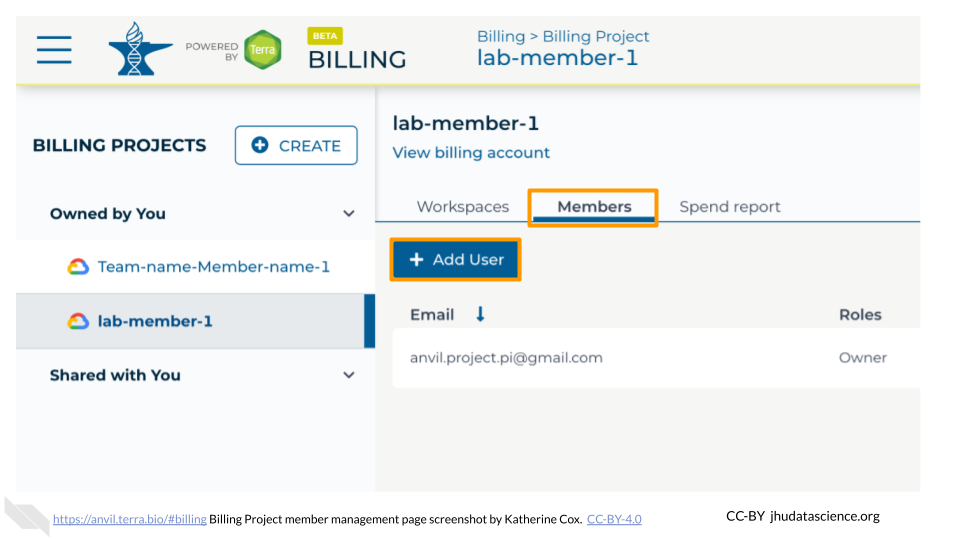
Click on the “Members” tab to view and manage members. Then click the “Add User” button.
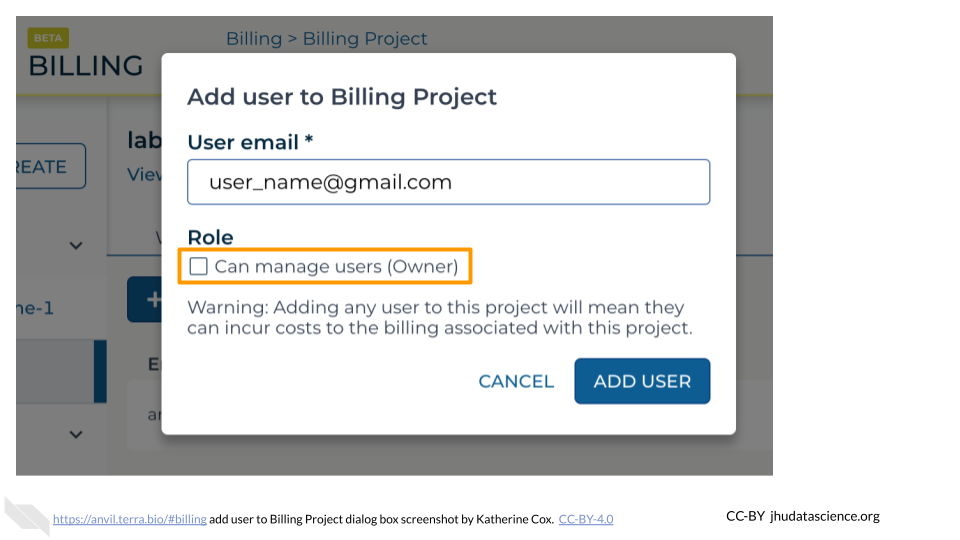
Enter the email address of the user or group you’d like to add the the Billing Project.
- If adding an individual, make sure to enter the account that they use to access AnVIL.
- If adding a Terra Group, use the Group email address, which can be found on the Terra Group management page.
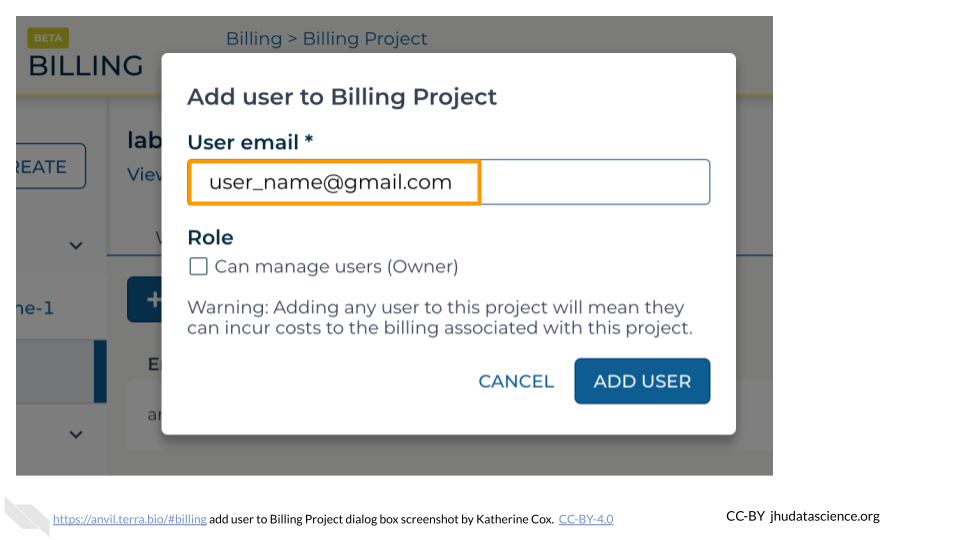
If this user or group will need to add and remove other users of the Billing Project, check the Owner box. Otherwise leave it unchecked.
- It’s often a good idea to have at least one other Owner of a Billing Project in order to avoid getting locked out, in case the original owner leaves or loses access to their account.
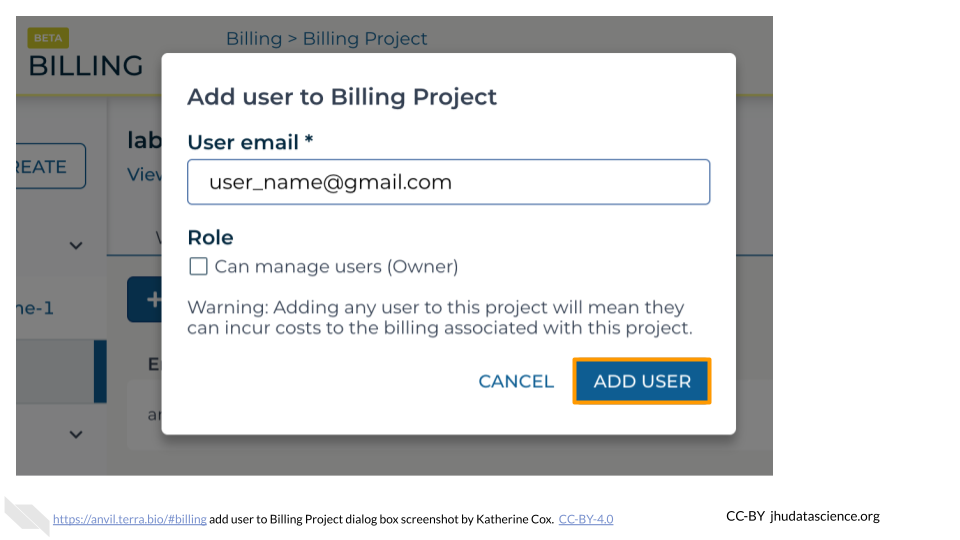
Click “ADD USER”.
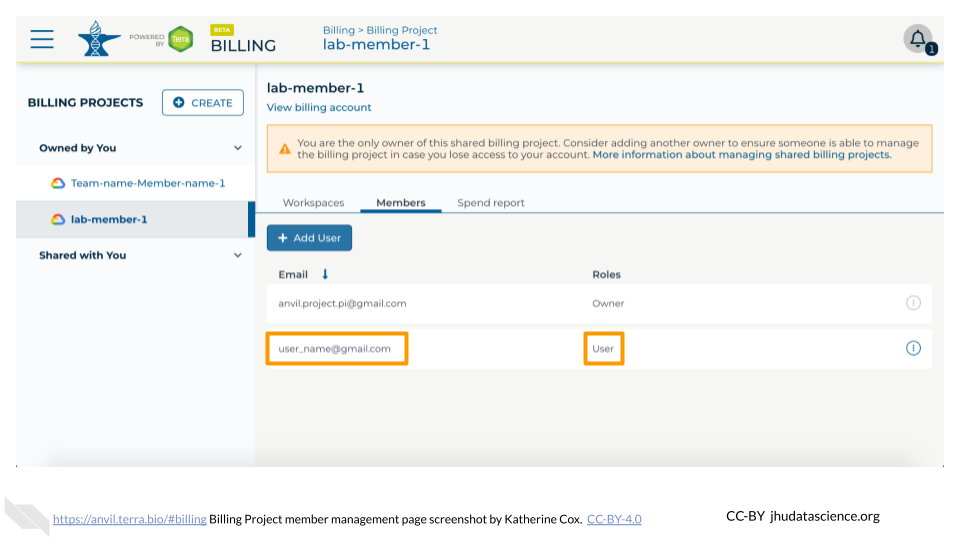
You should now see the user or group listed in the Billing Project members, along with the appropriate role. They should now be able to use the Billing Project to fund work on AnVIL.
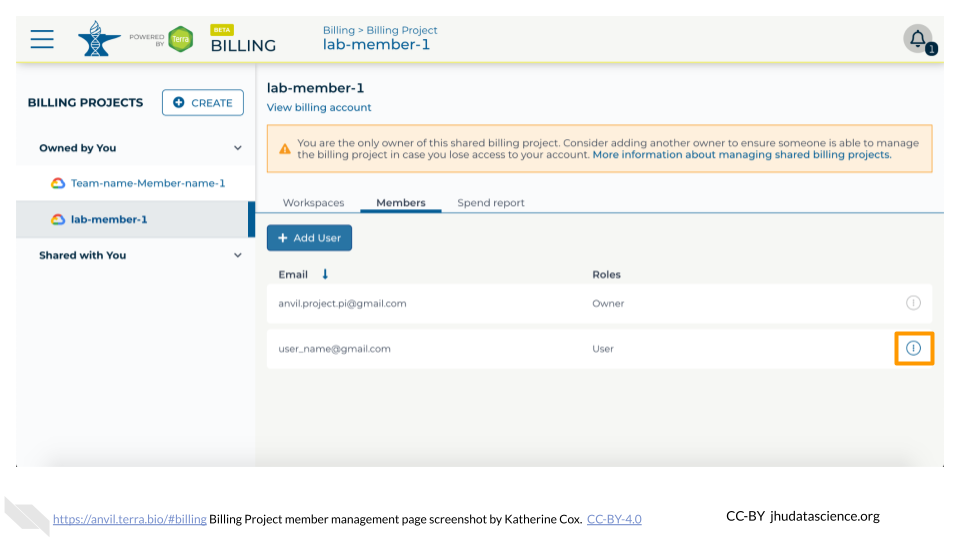
If you need to remove members or modify their roles, you can do so at any time by clicking the teardrop button next to their name.
Make sure the newly added Student Group displays “User” under “Roles”.
13.2 Before: Direct Students to Clone Workspace
Your students will each need to clone their own copy of the class Workspace.
We typically have students clone the Workspace in the first few minutes of class. This both helps ensure they won’t start up their cloud environments early, and ensures they get the most up-to-date version of the Workspace.
Student-facing instructions for how to clone a Workspace are provided in the Student Instructions section.
You will need to provide your students with a link to the Workspace they will be cloning, and the name of the Billing Project they should use.
13.3 After: Instruct Students on Shutdown
If your students will not be doing any more work in this Workspace, have students export any files they wish to keep. Once you disable Billing, they (and you) will lose access to files in the Workspace.
If your students will continue using the Workspace in a subsequent class or for homework, have them pause or delete the cloud environment to minimize charges accrued while they are not working.
13.4 After: Collect Feedback
If you are using one of the premade courses, we would appreciate feedback! If you are willing to ask your students to provide feedback, please direct them to this form:
https://forms.gle/6X77RKnbKPVG5qMn6
Responses are anonymous.
We would also greatly appreciate feedback from you as the instructor! Comments can be submitted through the same form, or if you are comfortable on GitHub you can open an issue in the corresponding repository.