Chapter 4 Set up Google Billing
Google Billing Accounts are how you pay Google for you and your students’ cloud costs. Depending on how you are being funded, this may be taken care of for you. If your funding is being managed by a third party (e.g. through a funding mechanism such as STRIDES, or through your institution), contact them to determine whether you need to do any billing administration through Google. If not, you can proceed directly to create Instructor Group.
If you are new to AnVIL, we strongly recommend seeking funding through NHGRI / STRIDES for teaching your course. In order to prevent abuse, Google sets certain limits on cloud resources available to new users that can complicate teaching (e.g. project quotas). As you or your institution builds a payment history with Google, the limits on your accounts will be relaxed. In the meantime, STRIDES funding can help ensure your initial classes run smoothly.
What is STRIDES? NHGRI’s strategic vision highlights the importance of training the next generation of genomic scientists. In collaboration with the NIH Office of Data Science Strategy, NHGRI makes funding available to AnVIL users through the STRIDES program, which aims to promote biological research in cloud environments.
To inquire about funding your class on AnVIL, please contact help@lists.anvilproject.org.
If you are using a third party funding mechanism but you would like to get started exploring AnVIL right away, you can optionally follow the instructions below to activate Google’s free credits. These should be sufficient for you to experiment with a few exercises yourself and learn how AnVIL works, while you work on getting funding set up for your class.
4.1 Before You Start
- If you are managing your own billing, you will need a credit card or bank account to get started. Google provides a free trial for first-time users, but payment information is still needed for verification purposes. Don’t worry! If using the free trial, you won’t be billed until you explicitly turn on automatic billing.
- Before setting up billing yourself, you may want to check with your institutional procurement office and see if they have a preferred account set-up method with Google (such as a third party reseller or an existing account).
4.2 Google Billing Account
AnVIL operates on Google Cloud Platform, and does not charge any markup. Rather than paying Terra or AnVIL, users set up billing directly with Google Cloud Platform.
Make sure to use the same Google account ID you use to log into Terra for Google Cloud Billing.
To set up billing, you must first create a Google “Billing Account”.
Tip: You can create multiple Billing Accounts associated with your Google ID.
- A single Billing Account can fund multiple courses, sections, or iterations of a course, as long as they have a common funding source.
- But, if courses are funded separately, we recommend creating separate Billing Accounts
4.2.1 Create a Google Billing Account
Log in to the Google Cloud Platform console using your Google ID. Make sure to use the same Google account ID you use to log into Terra.
If you are a first time user, don’t forget to claim your free credits! If you haven’t been to the console before, once you accept the Terms of Service you will be greeted with an invitation to “Try for Free.”
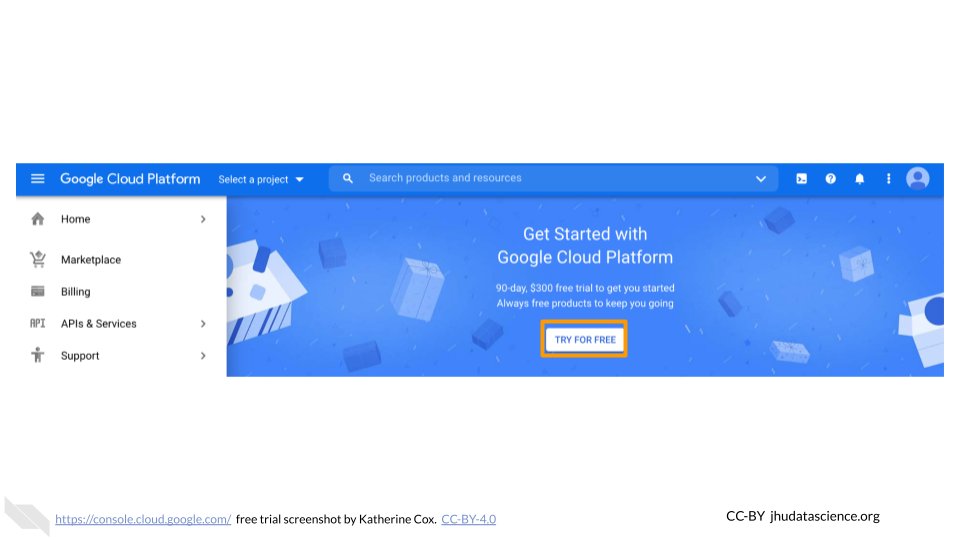
Follow the instructions to sign up for a Billing Account and get your credits.
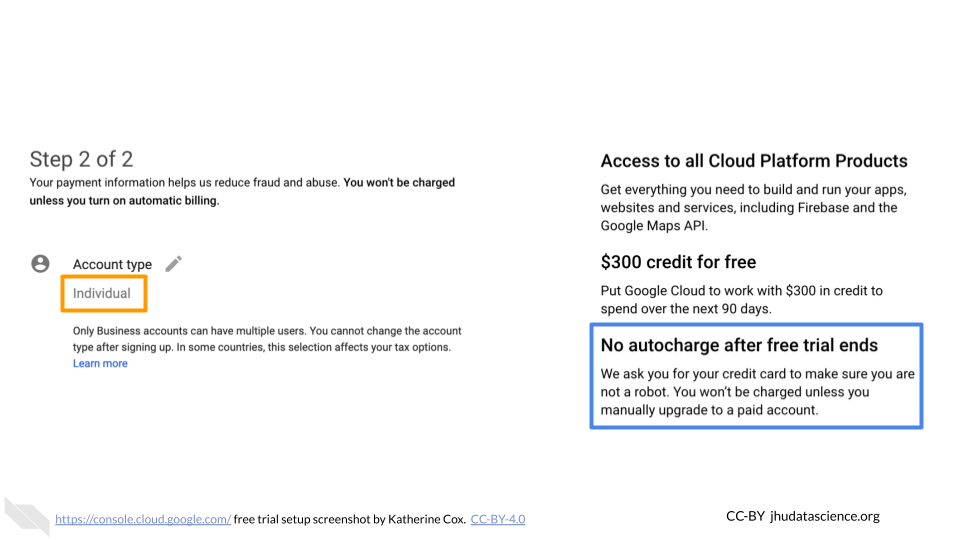
Choose “Individual Account”. This “billing account” is just for managing billing, so you don’t need to be able to add your team members. You will need to give either a credit card or bank account for security. Don’t worry! You won’t be billed until you explicitly turn on automatic billing.
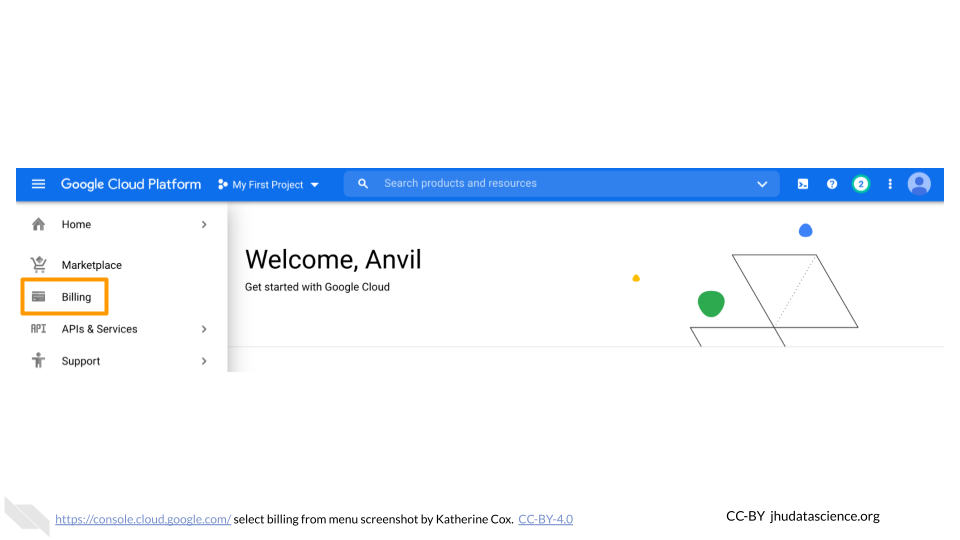
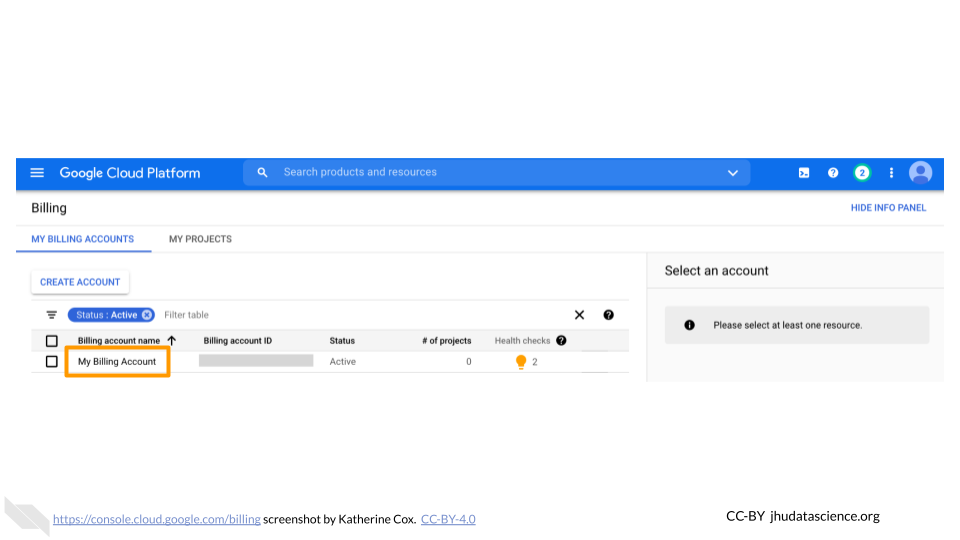
You can view and edit your new Billing Account, by selecting “Billing” from the left-hand menu, or going directly to the billing console console.cloud.google.com/billing
Clicking on the Billing Account name will allow you to manage the account, including accessing reports, setting alerts, and managing payments and billing.
At any point, you can create additional Billing Accounts using the Create Account button. We generally recommend creating a new Billing Account for each funding source.
4.2.2 Add Users or Viewers (optional)
If you have a finance administrator who needs access to a Billing Account, you can add them with a few different levels of permissions. Generally the most useful are:
- Users have a great deal of power over spending - they can create new “Billing Projects” and control who can spend money on those projects. If you have an accounts manager responsible for expenses, it may make sense to add them as a Billing Account User. If you wish to retain full control over who can spend money, you should not add any Users.
- Viewers can see the activity in the Billing Account but can’t make any changes. This can be useful for finance staff who need access to the reports, or for anyone who needs to monitor spending.
Anyone you wish to add to the Billing Account will need their own Google ID.
To add a member to a Billing Project:
Log in to the Google Cloud Platform console using your Google ID.
Navigate to Billing

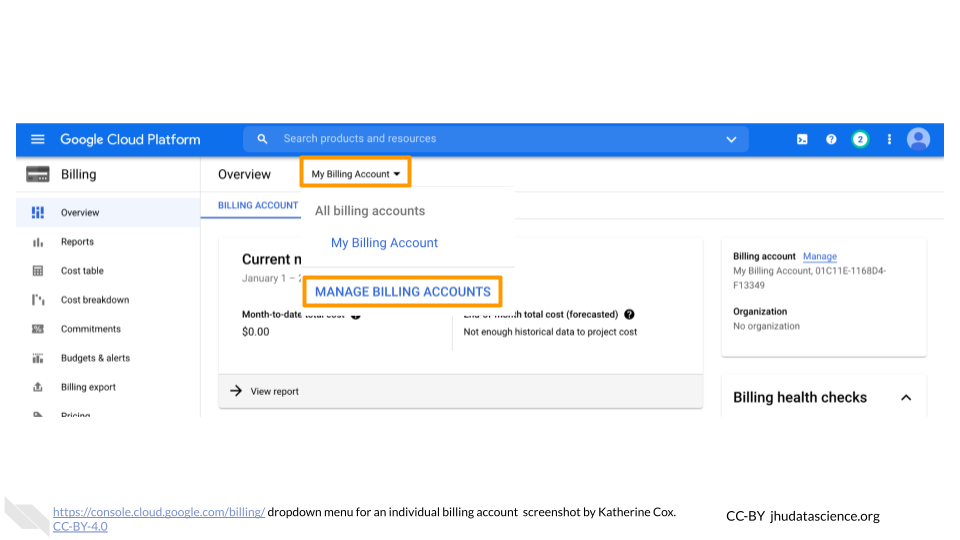
You may be automatically directed to view a specific Billing Account. If you see information about a single account rather than a list of your Billing Accounts, you can get back to the list by clicking “Manage Billing Accounts” from the drop-down menu.

Check the box next to the Billing Account you wish to add a member to, click “ADD MEMBER”.

Enter their Google ID in the text box. In the drop-down menu, mouse over Billing, then choose the appropriate role.
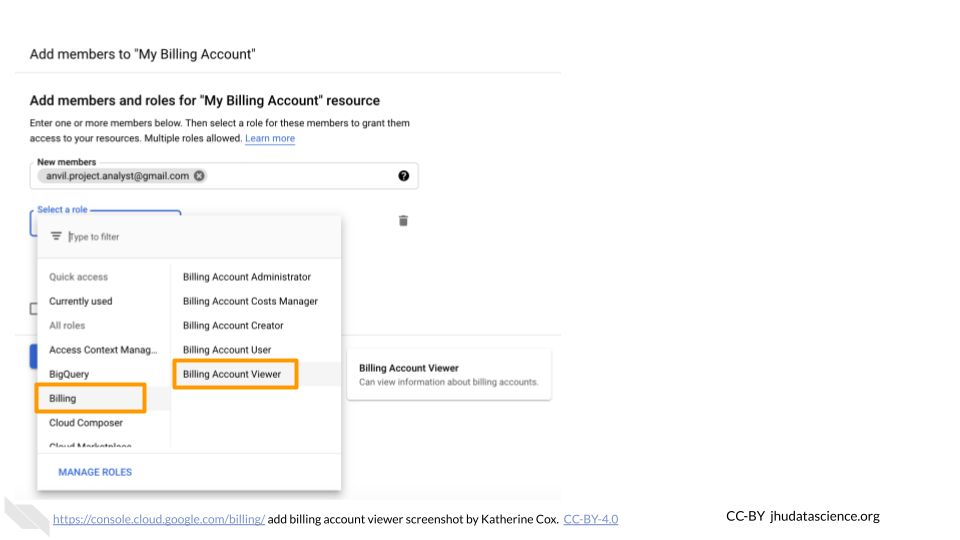
Click “SAVE”.

4.3 Add Terra to Google Billing Account
This gives Terra permission to create projects and send charges to the Google Billing Account, and must be done by an administrator of the Google Billing Account.
Terra needs to be added as a “Billing Account User”:
Log in to the Google Cloud Platform console using your Google ID.
Navigate to Billing

You may be automatically directed to view a specific Billing Account. If you see information about a single account rather than a list of your Billing Accounts, you can get back to the list by clicking “Manage Billing Accounts” from the drop-down menu.
Check the box next to the Billing Account you wish to add Terra to, click “ADD MEMBER”.

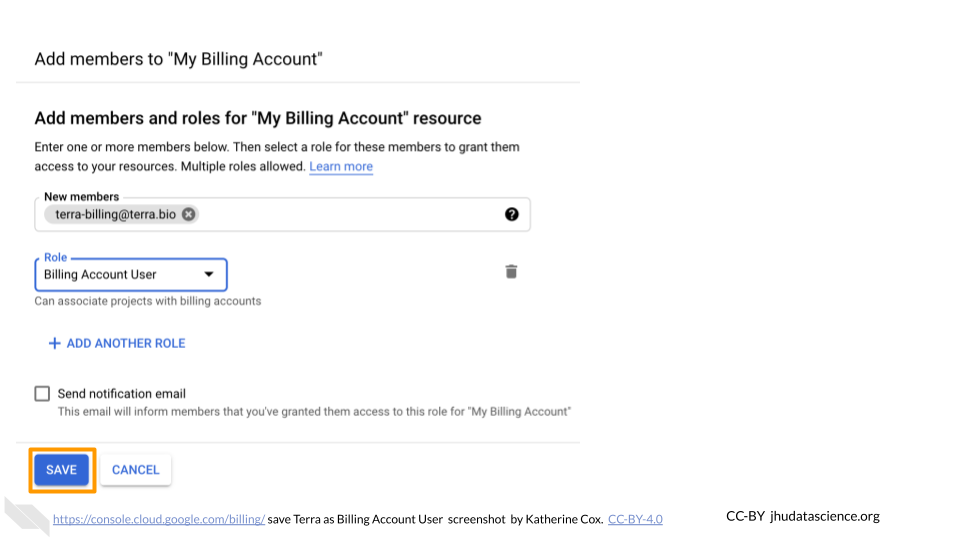
Enter
terra-billing@terra.bioin the text box. In the drop-down menu, mouse over Billing, then choose “Billing Account User”.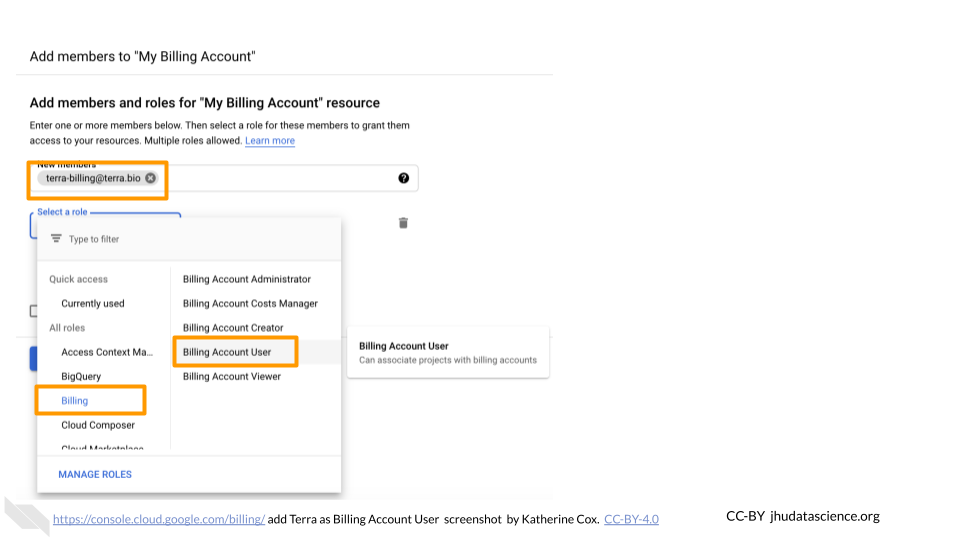
Click “SAVE”.